
Integrating Malomo and Postscript
Est Time: 10-15 Minutes.
Getting Started:
The Malomo and Postscript integration offers Merchants a powerful avenue to deliver real-time automated SMS updates to their customers. The Postscript integration will deliver SMS updates to recipients with tracking updates and a link to the customer’s unique tracking page.
In order to make sure that your Postscript account can function properly with Malomo, please ensure both are connected to the same Shopify Account. For more information on how Postscript uses Automations, see here.
Before moving forward with setting up Automations - we recommend taking a look at our Malomo and Postscript Best Practices.
Integration Setup:
Step 1: Create a Postscript private API key
In order to send data to your Postscript account, you will need to create a private API key to be used by the Malomo integration.
To create a Postscript private API key:
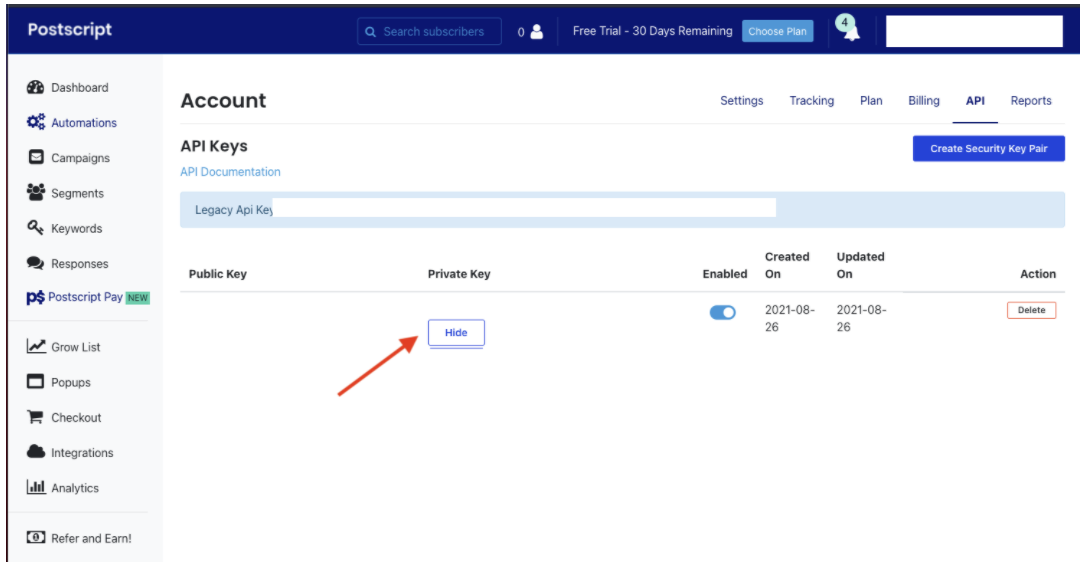
Log in to your Postscript dashboard and navigate to API’s in the upper right hand corner.
From the API screen, select Create Security Key Pair. You will see a new pair of API keys appear in the list below. The Private Key is the one you will need to provide to Malomo.
Step 2: Connect Malomo to your Postscript account
Navigate to the Apps section and click on the Install button for the Postscript.
Once on this integration page, you will be able to copy and paste your API key from step 1. Do this and hit continue.
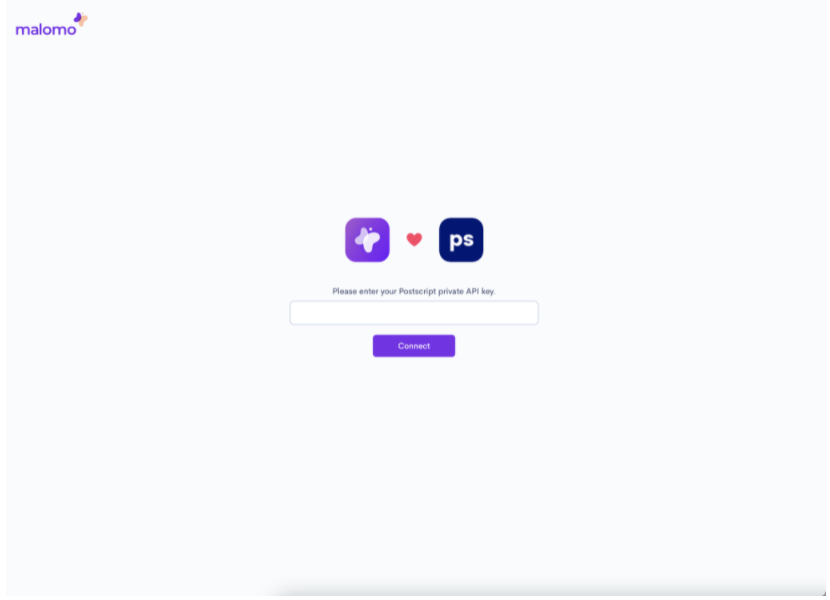
Authenticate this API key with your username and password. Upon authentication, this API key will be added and will connect your Postscript Account to Malomo.
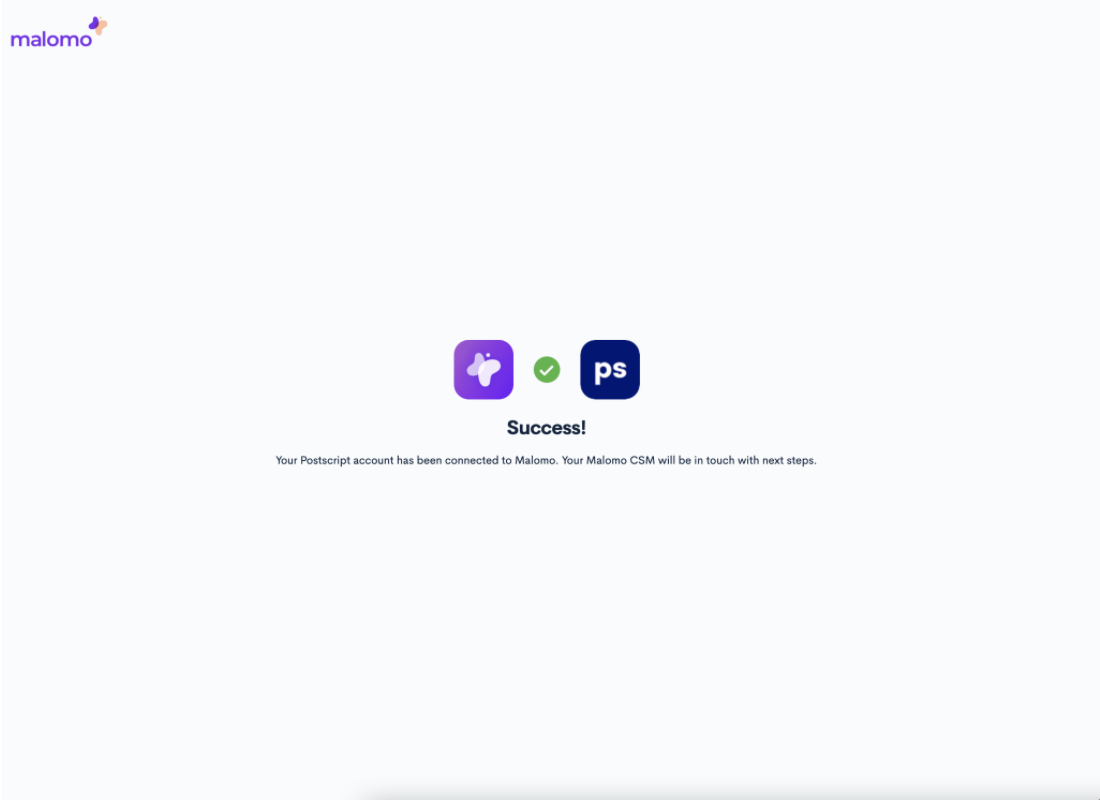
Congratulations, you have successfully authenticated your Postscript Account with Malomo! If you see a status other than “Success!”, please email help@gomalomo.com and our team will assist you.
Step 3: Review or Set your Default Tracking Page URL
Postscript uses the Default Tracking Page URL set in the Malomo Dashboard to share your live tracking page with your customer. To review this page, go to Malomo > Account > Overview and look for the Default Tracking Page URL section. If this section is blank, please add in the full URL of your live tracking page. If you have multiple live tracking pages, please select the page you would like to assign as the default tracking experience.
To learn more about setting or reviewing your default tracking page, check out this article.
Step 4: Setting up Automations between Malomo and Postscript
The Malomo and Postscript Integration rely on orders to be placed in order to function. Prior to setting up an Automation, ensure you either have new orders placed, or place a “fake” order yourself in the time between the integration being authenticated and automations being set up.
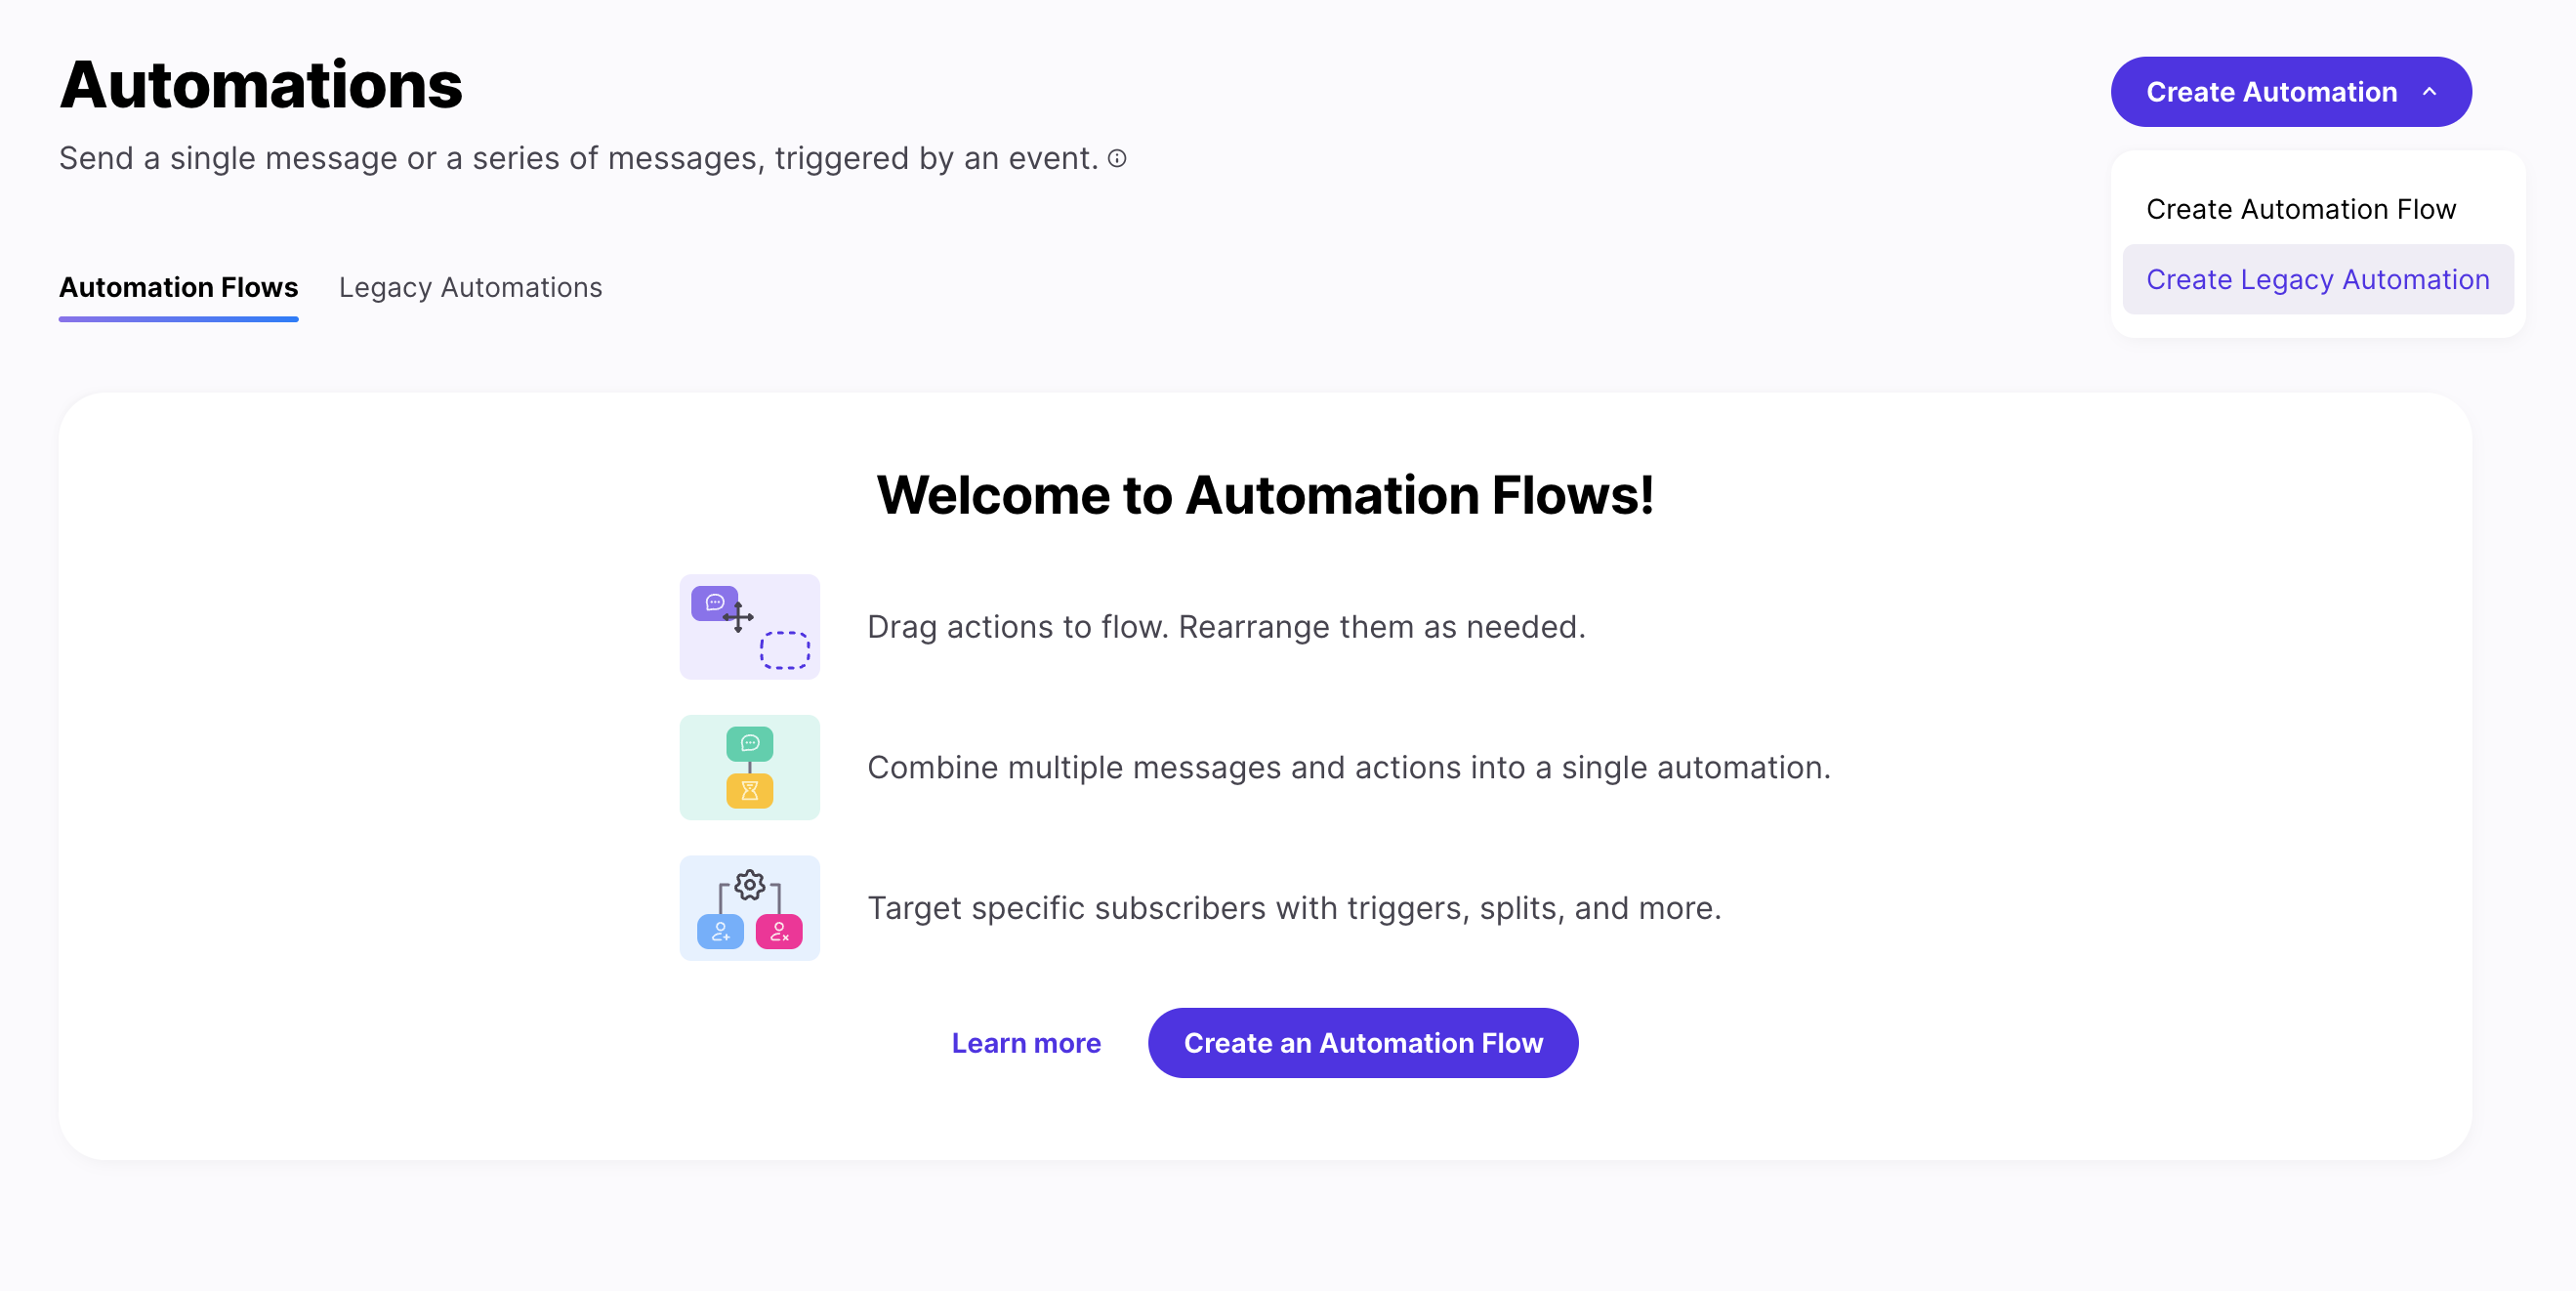

In your Postscript Dashboard, go to ‘Automations’ and click ‘Create Automation’. Click ‘Create Legacy Automation.’
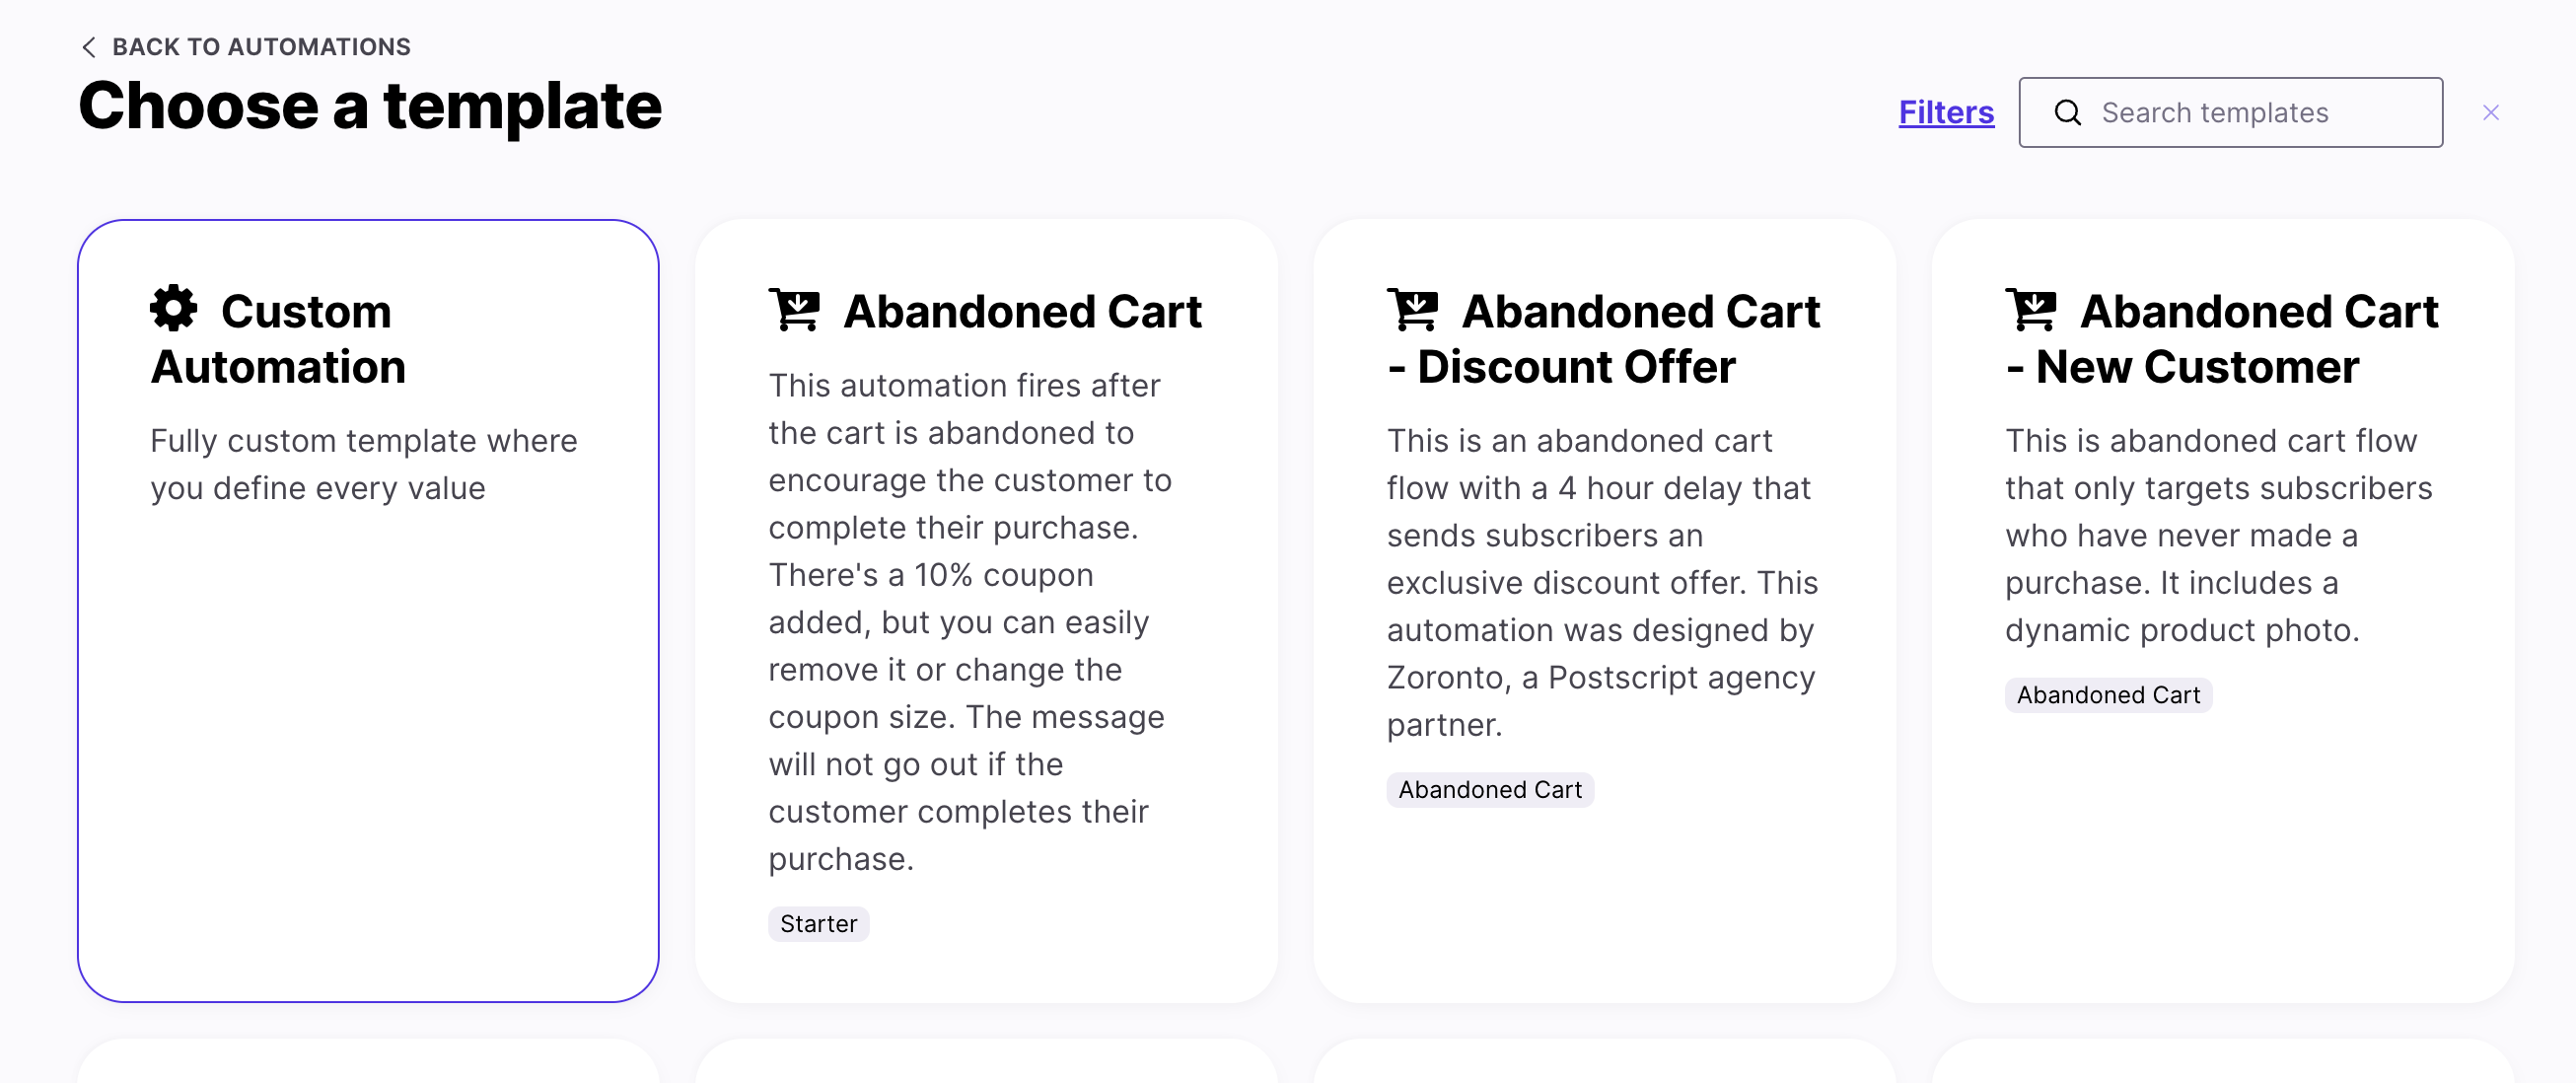
Click ‘Custom Automation’ to create an automation flow off of the Malomo events.
From there, you will want to give your Automation a name. We recommend naming conventions similar to the trigger you have chosen to initiate the automation.
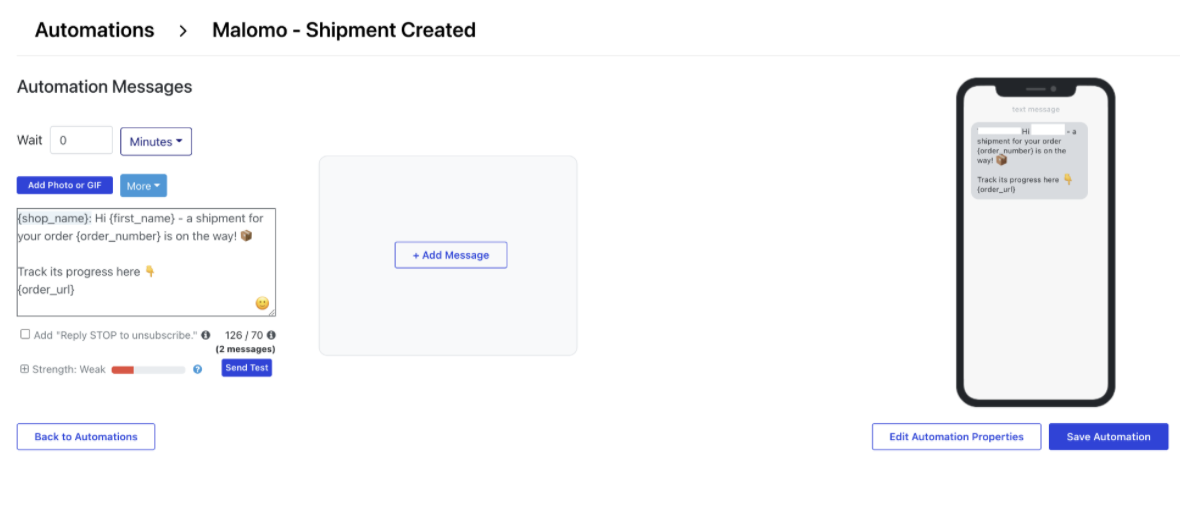
Once you have selected your trigger, you can determine the message properties that you want to be sent with your message. To link customers to your custom tracking page, we recommend using the
{ order_url}tag once you've set your Default Tracking Page URL. You can also build your tracking URL with the{order_id}tag, such as this:www.brandname.mymalomo.com/xxxxx/?_m_id={order_id}We also recommend using the
{order_number}tag to give customers a reference point.We recommend that you run through a few tests of your Integration to your own user prior to saving your work.
We also recommend that you add “Reply STOP to unsubscribe” in your message and try to keep your text under 160 characters.
Once you are comfortable with your automation, hit save!
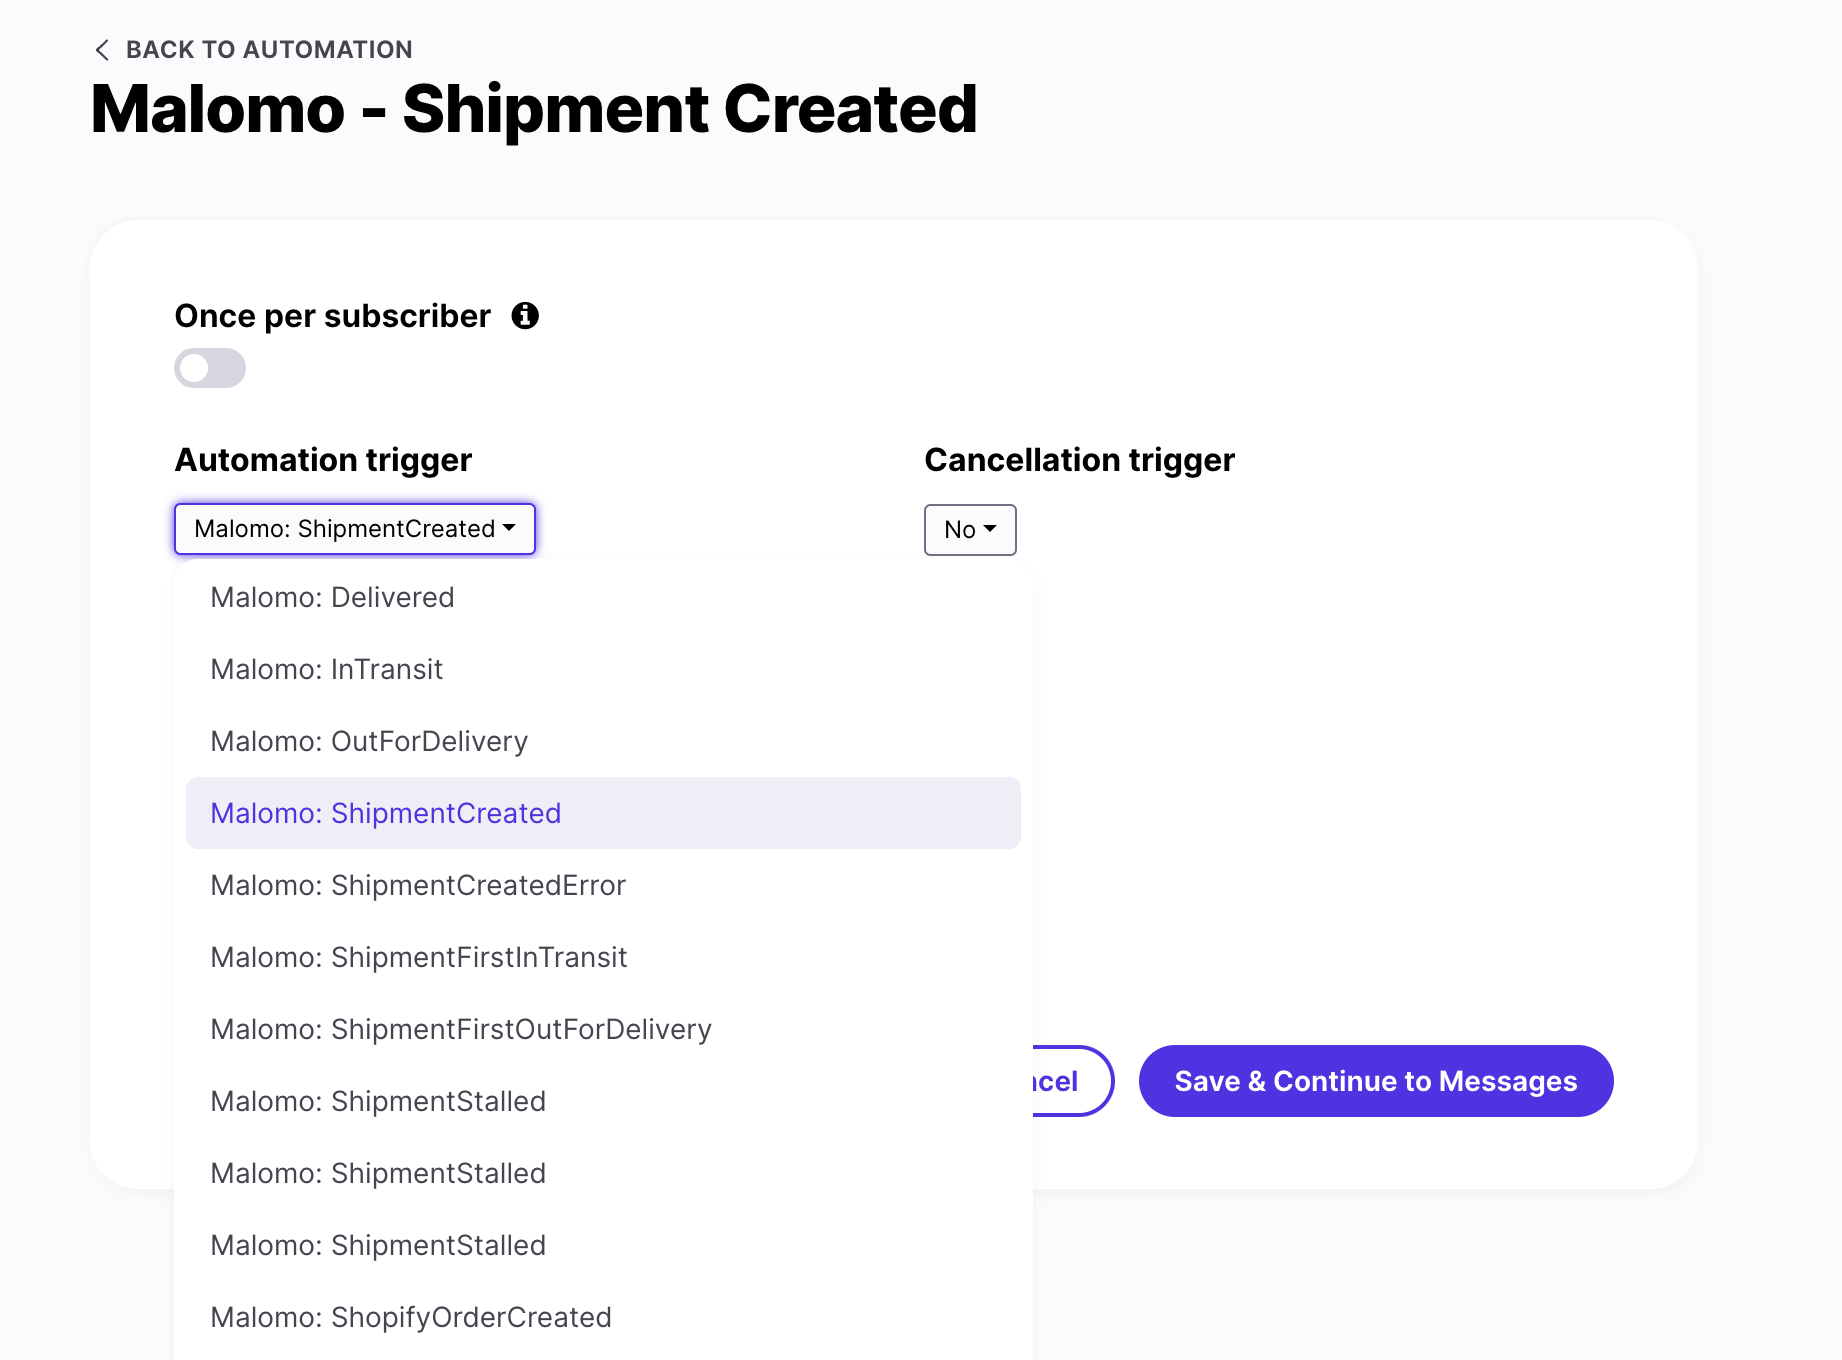
Available Triggers with Malomo
When a trigger is fired (when a Malomo event occurs), an active Postscript automation for that trigger must also exist in your account in order for SMS notifications to be sent.
Event name | Description |
| Shopify records a new order placed by a customer. |
| Shopify records a new shipment on an order and that shipment registers in the Malomo platform. |
| Malomo records an error when trying to register a shipment in the Malomo platform. Learn more about error codes here. |
| A shipping label was created and has been registered in the carrier’s system. However, the carrier has not yet taken possession of the shipment. |
| Only the first scan event when the shipment is in the carrier’s possession and is en route to its destination. |
| The shipment is in the carrier’s possession and is en route to its destination. |
| Only the first scan event when the shipment is currently on its last mile and is en route to the destination address. |
| The shipment is currently on its last mile and is en route to the destination address. |
| The local delivery vehicle has reported the package was delivered. |
| The shipment was not successfully delivered and is en route back to sender. |
| The delivery has been canceled typically by either the seller or recipient. |
| The shipment is available for pickup from the carrier’s facility such as a post office. |
| A delivery was attempted but the shipment could not be delivered. |
| An unknown delivery error occurred. |
| An order that has been created but has not been fulfilled in the specified time frame within our Problem Orders feature. |
| An order that has been fulfilled or is in transit and has not received a scan update in the specified time frame within our Problem Orders feature. |
*Please note, we do not recommend triggering off of InTransit or OutforDelivery, as the journey may trigger multiple texts to your customer. Please use our Malomo: ShipmentFirstInTransit and Malomo: ShipmentFirstOutForDelivery triggers instead.