How to Turn on Malomo Transactional Emails
Once you have a live branded tracking page and have finished customizing your emails, you’re ready to start notifying your customers with this new post purchase experience.
Step One: Confirm Your Default Tracking Page URL
Your Malomo account must have a default tracking page set in the dashboard in order to send transactional emails. The Track Your Package button within the order status emails will link to the Default Tracking Page URL set for your account.

To configure your Default Tracking Page URL, navigate to the Account section in the dashboard. Paste the base URL of your tracking page in the Default Tracking Page URL section. Click Update Account when finished.
If you've used our Shopify Theme App or Malomo.js to host your tracking page, your base URL might look like this:
https://yourbrand.com/pages/order-trackingMalomo hosted tracking pages are formatted like this:
https://yourbrand.mymalomo.comorhttps://yourbrand.mymalomo.com/xxxxx
To read step by step instructions, check out our Set Your Default Tracking Page URL article.
Step Two: Disable Your Current Order Status Notifications
To prevent duplicate email sends, you will need to disable your current order status notifications before turning on the Malomo transactional emails. For apps such as Klaviyo or Attentive, this will mean moving the automated flow or journey into a draft mode.
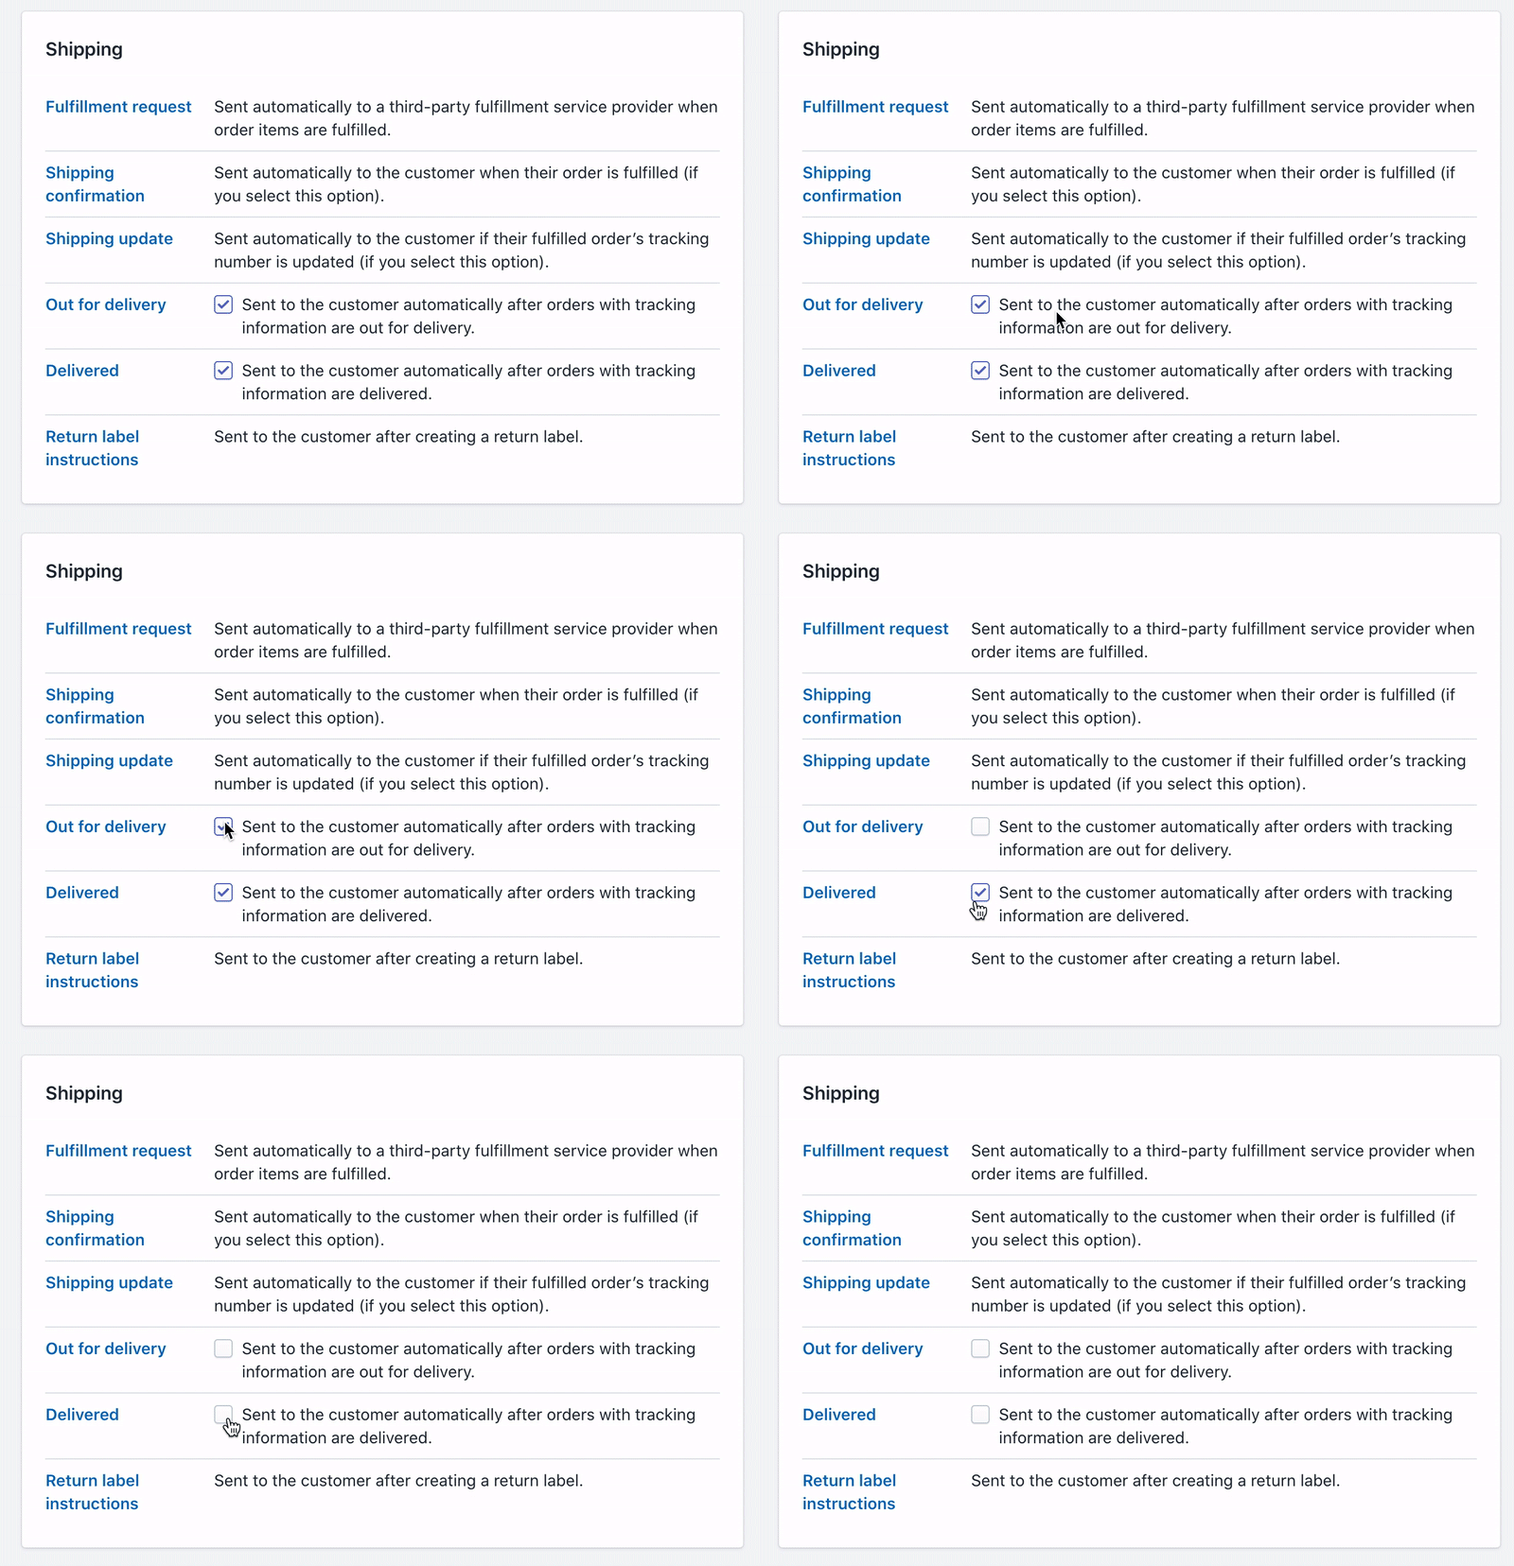
If you are using Shopify default notifications, you will need to disable the Shopify "Out for Delivery" and "Delivered" emails within your Shopify admin. To do so, navigate to the Settings page and click Notifications. Scroll down to Shipping and uncheck the Out for delivery and Delivered options.

Please note, only Shopify Plus plan merchants have the ability to disable the default Shopify Order Confirmation and Shipping Confirmation emails. To do so, please reach out to your Shopify Plus main contact or Shopify Plus support at plusspecialists@shopify.com. Check out Shopify’s notification documentation for more information.
Standard Shopify plan members are unable to turn off the default Shopify Order Confirmation and Shipping Confirmation emails. However, you may add our code snippet and link to your Malomo tracking page in these two default Shopify notifications. Learn how to do this via our Linking to your Malomo tracking page in Shopify emails article.
Step Three: Enable Each Individual Email Template
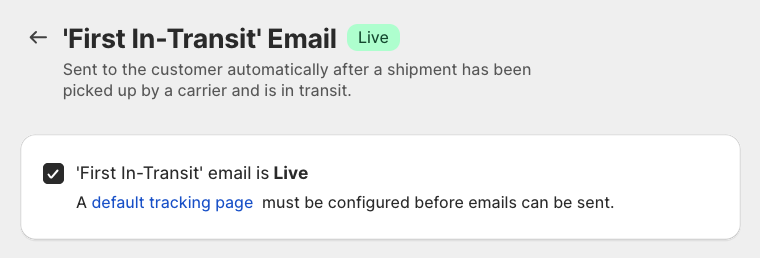
To turn on your transactional emails, navigate to each individual email template and click the top checkbox. The status message next to the checkbox will change to Live. Click the Save button on the template and repeat for each email you intended to enable.

In the main Transactional Emails section of the dashboard, you’ll see the status for each enabled email change to Live. You are now sending Malomo transactional email! To view analytics on your transactional emails, as well as view email activity by customer, check out the Email Performance Report within the reporting section of the dashboard.

Learn more about how to send Malomo Transactional Email order notifications with these articles:
