Customizing Individual Email Templates
Once your base template has been customized, you are ready to customize the individual template for each email status you’d like to enable. This will allow you to add in different images and messaging for each email status. Please make sure you have first customized your base email template before moving forward.
Please note, we do not recommend enabling the Order Confirmation and Shipping Confirmation emails unless you are on a Shopify Plus plan. Only Shopify Plus merchants can disable these notifications in Shopify. To learn more about this, please see our article on How to Disable Shopify Notification Emails. For Standard Shopify plan members, learn how to add our code snippet and link to your Malomo tracking page in these two default Shopify notifications here.
Follow these instructions to customize your base email template:
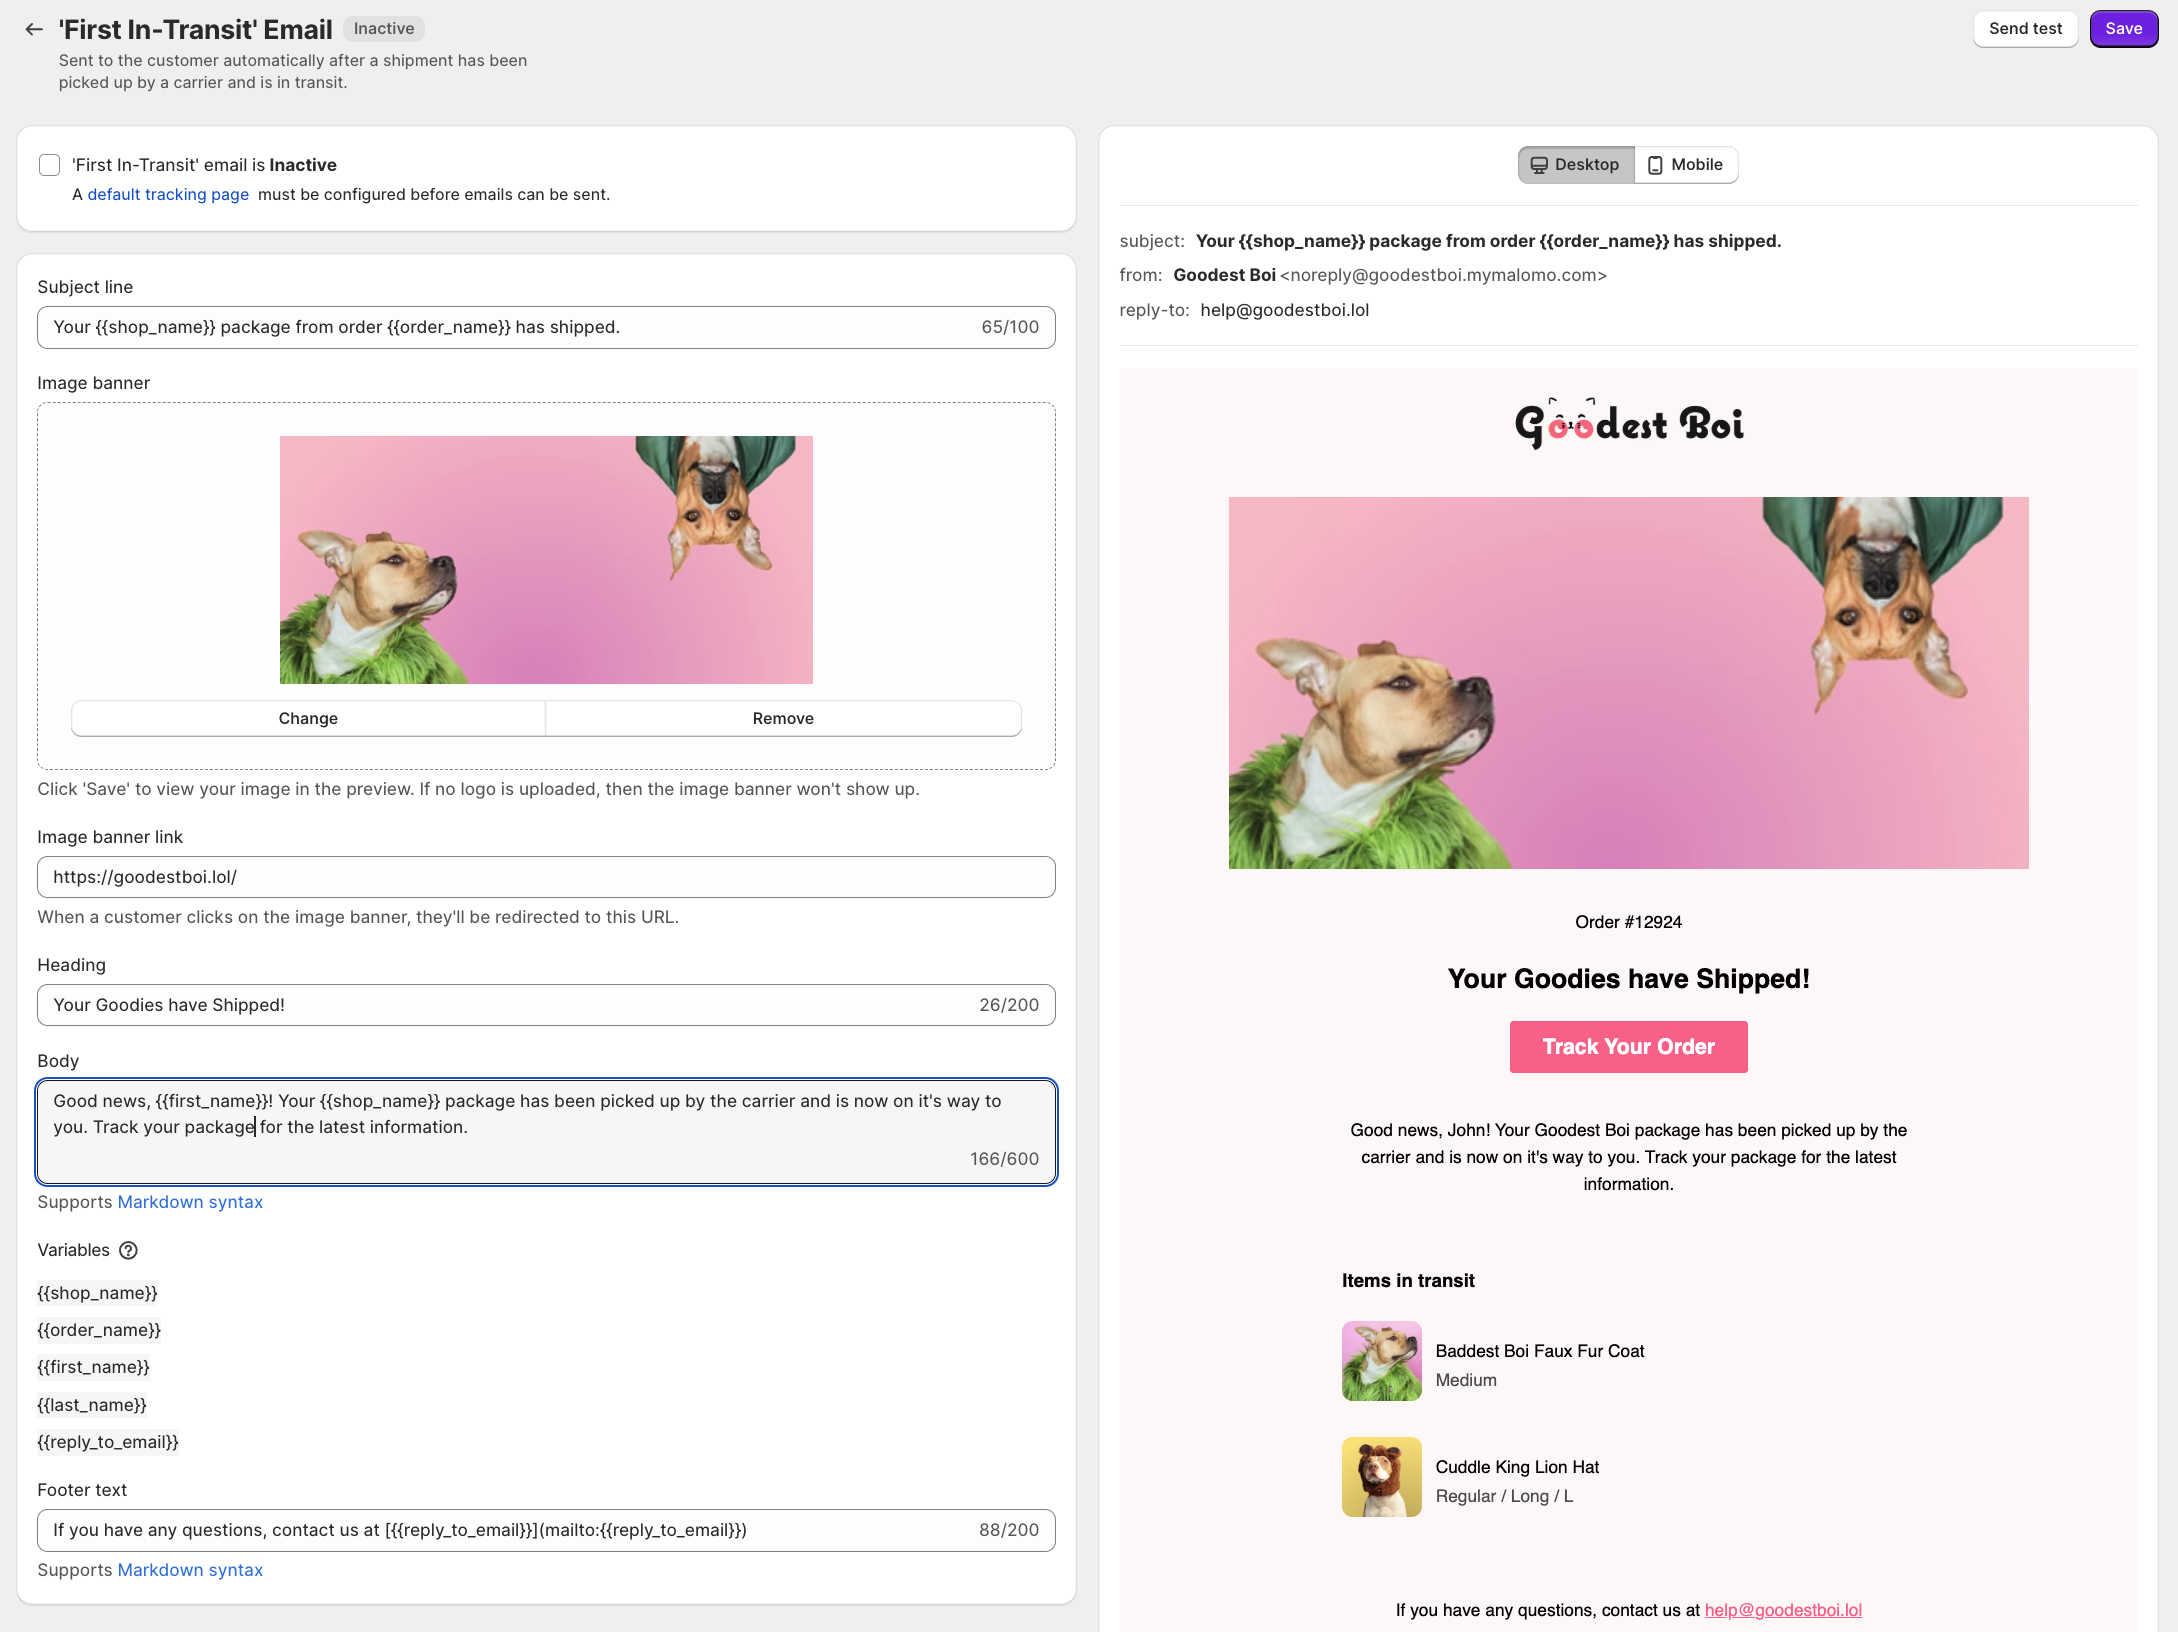
Within the Malomo Emails section, click on the title of the email you’d like to customize and ultimately enable. For this example, we’ll customize the ‘First in-Transit’ Email.

Do not click the top checkbox that denotes the email is Inactive until you are ready to turn on the email. Once the checkbox is checked and email is saved, the email will be marked as Active and this enable the email to begin sending to your customers.
Update the email Subject line, Heading title, Body copy, and Footer text to the messaging you’d like to use. Our system supports markdown syntax for design formatting and you may use the following variables within any text input box:
{{shop_name}}
{{order_name}}
{{first_name}}
{{last_name}}
{{reply_to_email}}
In the Image banner section, upload a hero image to display at the top of the email by clicking the Change button. Please note, only .jpg and .png files are accepted and we recommend an image width of 800px or larger. The max file size is 1MB. If you do not want to display an image in the email, click the Remove button.
In Image banner link, enter in the preferred URL to direct recipients to when the hero image is clicked.
Scroll down in the preview screen on the right to view changes and click between the Desktop and Mobile buttons to view the template for each screen size.
To preview a test email, click on the Send test button at the top right of the screen.
When finished with customizations, click on the Save button.
Repeat the above steps for each email status you’d like to enable.
Once the individual email templates have been customized, you are ready to finish the setup and turn on the emails. We recommend that you complete all the email customizations first, confirm you have a default tracking page URL set in the dashboard next, and then finally turn off your current emails and turn on your Malomo emails. Read on for more information about these final steps via our How to Turn on Malomo Emails article.
Learn more about how to send Malomo Transactional Email order notifications with these articles:
