How to Design an Order Notification Email using Malomo Data
At this time, Attentive does not support cloning email templates between accounts. Unfortunately, due to this, Malomo will be unable to assist with providing an email template to customize. However, users will be able to build notification emails with the Attentive email editor using drag and drop content blocks or by providing HTML.
To begin designing an email template, navigate to Email Templates in the left side navigation and click on Create Template. From here, you will drag and drop content blocks or your customized rows to the email template to build the basic layout. Learn more about the basics of designing emails in Attentive here.
Recommended Order Notification Layouts
Most merchants use a combination of the sections listed below as the basic layout for order notification emails. See our suggestions for the corresponding Attentive content block to use for each section.
Order Confirmation Email
Example | Section | Attentive Content Block |
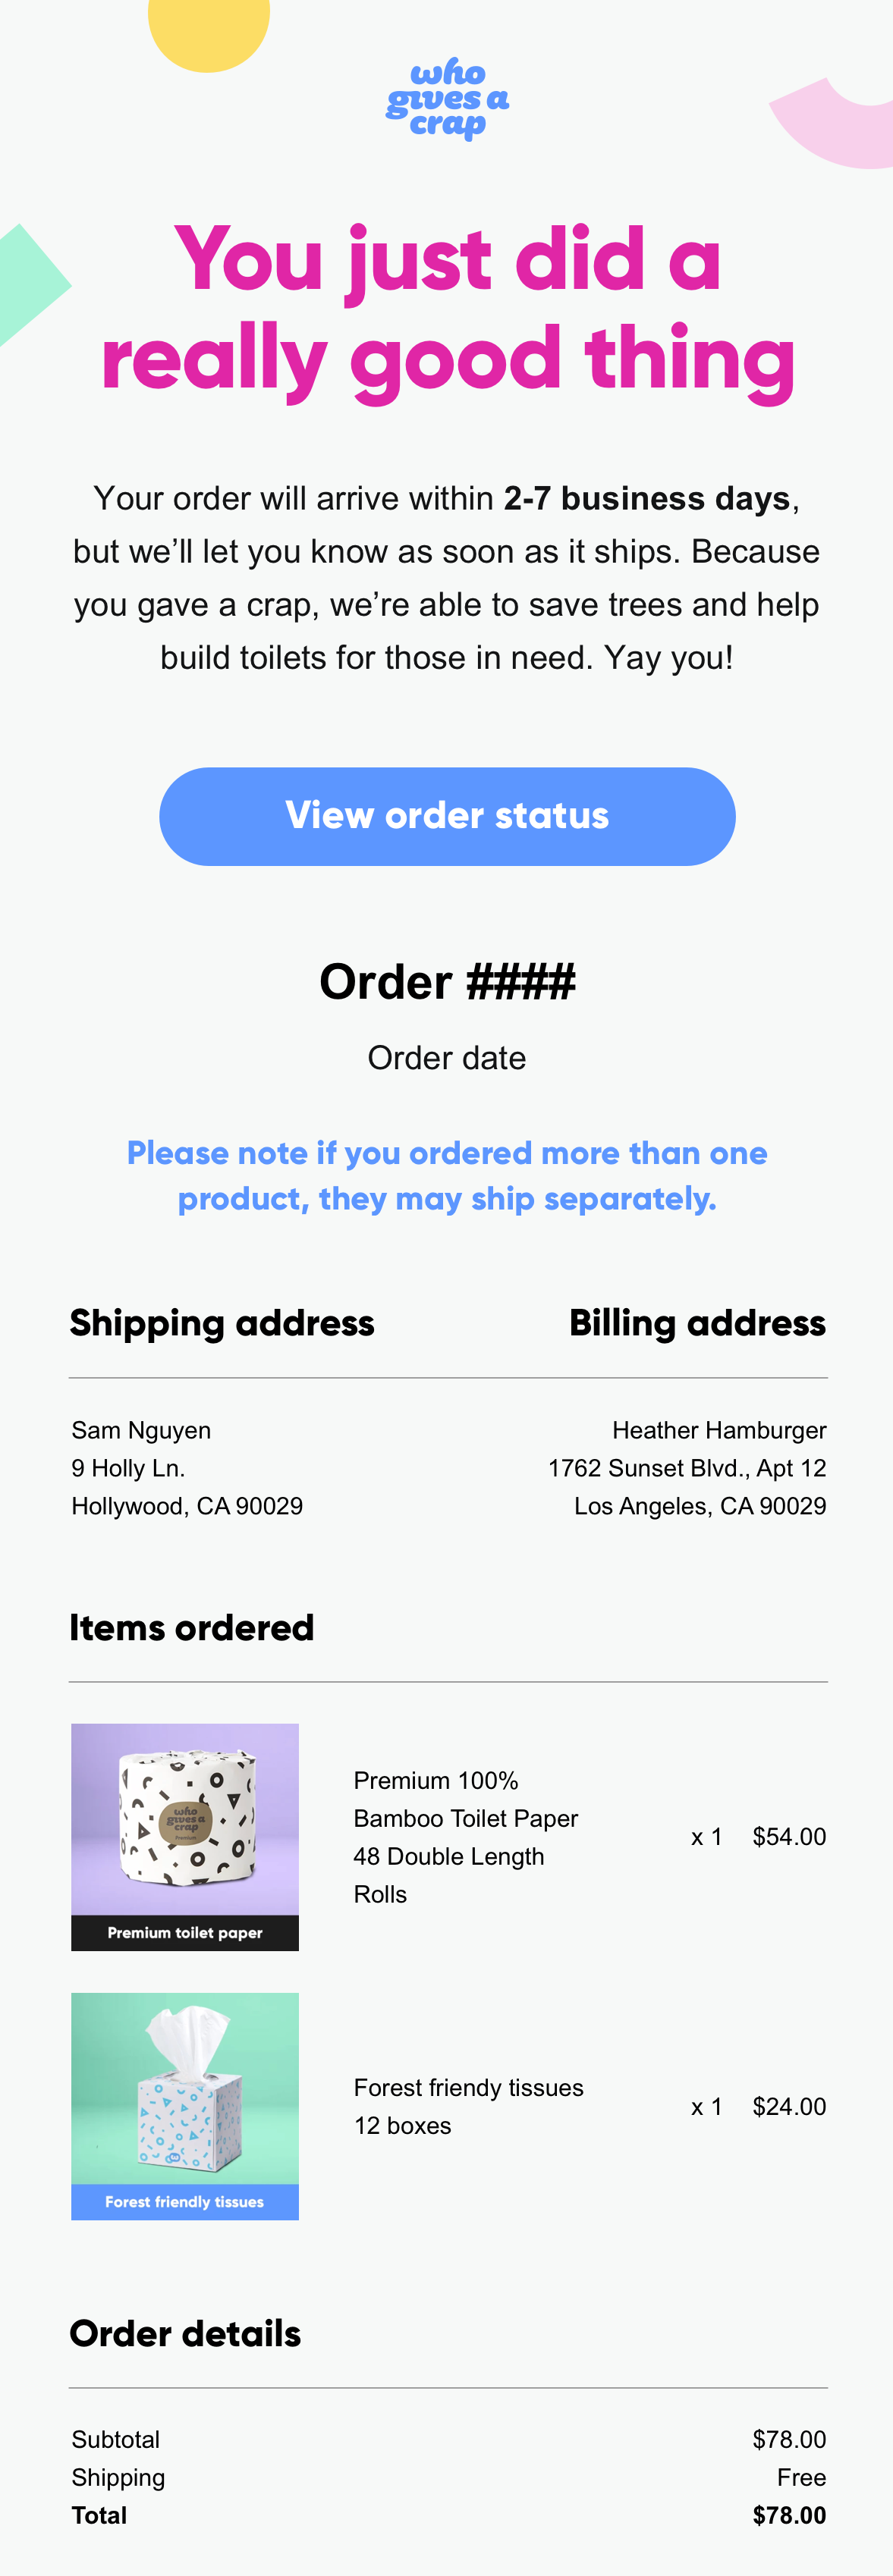 | Logo and top navigation bar | Image and Menu blocks |
Hero image | Image block | |
Order status header | Title block | |
Order status explanation | Paragraph block | |
Button to order status page | Button block | |
Order number | Title block | |
Order line items | Row with 2 columns; image and paragraph blocks | |
Order cost summary | Row with 2 columns; paragraph blocks | |
Billing and shipping address | Row with 2 columns; paragraph blocks | |
Social icons or footer | Social block |
Shipping Confirmation and Update Emails
Example | Section | Attentive Content Block |
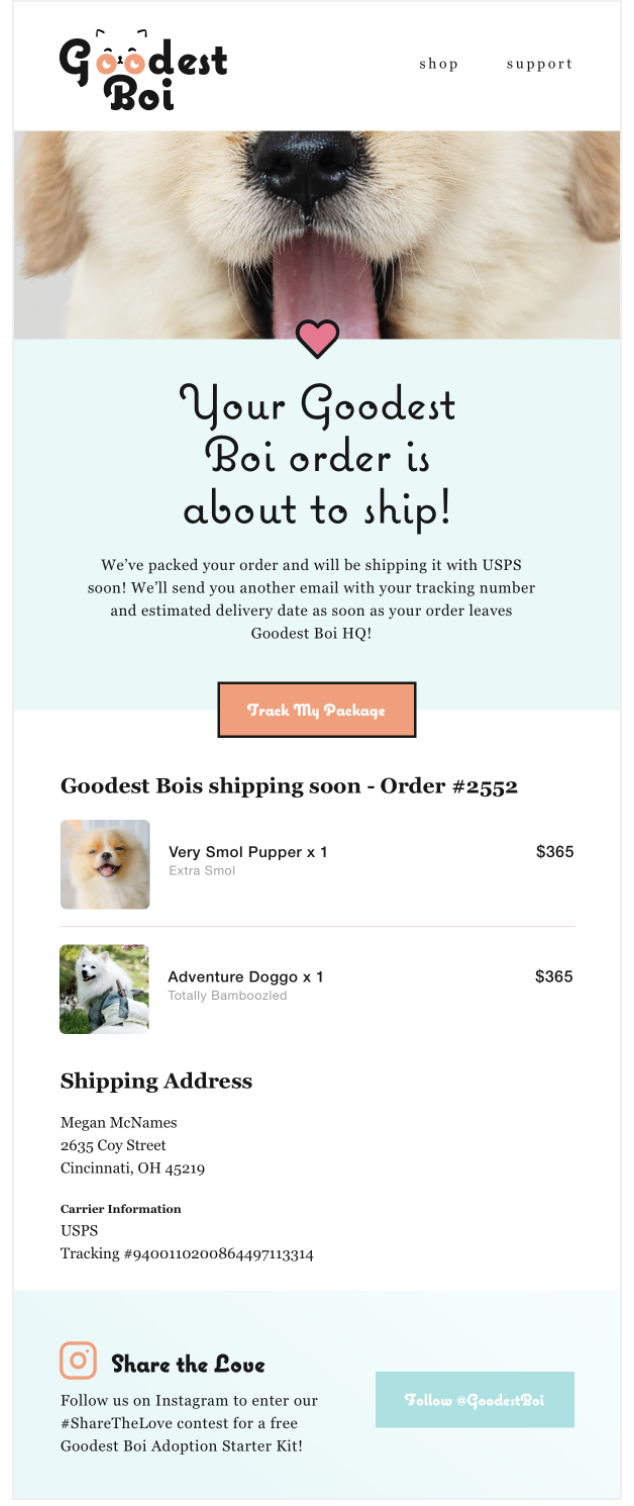 | Logo and top navigation bar | Image and Menu blocks |
Hero image | Image block | |
Shipment status header | Title block | |
Shipment status explanation | Paragraph block | |
Button to tracking page | Button block | |
Order number | Title block | |
Fulfillment line items | Row with 2 columns; image and paragraph blocks | |
Shipping address | Row with 2 columns; paragraph blocks | |
Carrier details | Row with 2 columns; paragraph blocks | |
Social icons or footer | Social block |
We recommend creating the layout and adding in placeholder text first for areas where you would display Malomo order and carrier information. Once you’re happy with the general design of the email, move on to adding in Malomo variables to finish the template.
How to Add in Malomo Variables to an Email Template
There are two ways to add Malomo variables within an email template:
You can copy and paste the variable from our list of most commonly used variables directly in an email template when you are building it. This can be done whether using the drag and drop builder within a journey or within the email templates section.
Use the Insert Variable button in the editor to see a list of available variables. Use the Choose Variable drop down and select Triggering Event. From here, you can scroll or search to find the desired variable. Please note, this will only work when building an email directly within a journey triggered by a Malomo event.
How to Link to the Tracking Page
To link customers to your custom tracking page, we recommend using the order_url variable once you've set your Default Tracking Page URL in the Malomo dashboard. If you change your default tracking page later, the order_url variable will automatically bring in the updated URL to notifications. Learn how to set the Default Tracking Page UR here.
If you have multiple tracking pages and wish to direct segments of customers to different pages, you can also build your tracking URL with the ‘order_id’ variable, such as this:
https://yourbrand.com/pages/order-tracking/?_m_id={{triggerEvent.custom['order_id']}}How to Format a Dynamic List to Create a Product Block and Show Line Items
Follow the steps below to create a dynamic list that will show all the items ordered or shipped:
In the drag and drop editor, drag the Dynamic List content block into your email template.
Click Add List.
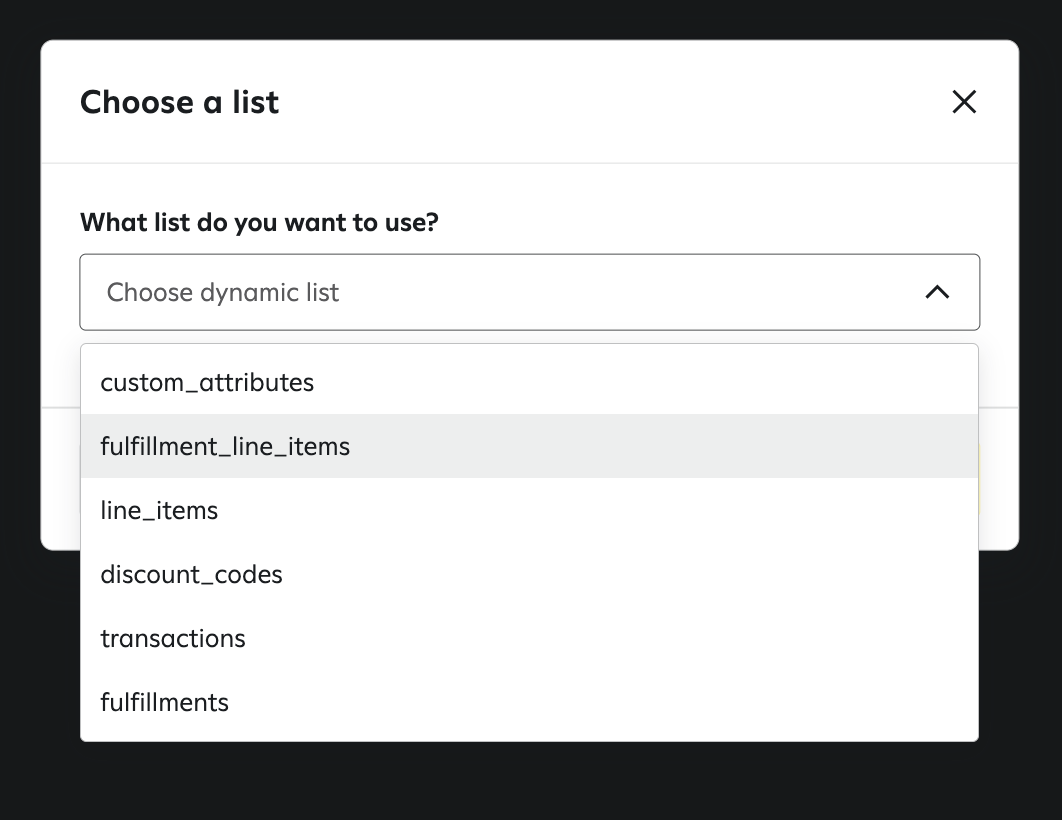
Use the Choose Dynamic List drop down to select either
line_itemsorfulfillment_line_itemsand the click Next.To show all the items ordered, please use
line_items. To show only the items packed in that shipment, please usefulfillment_line_items.
Select your preferred layout for the product block.
Under the List Details section, click on Image.
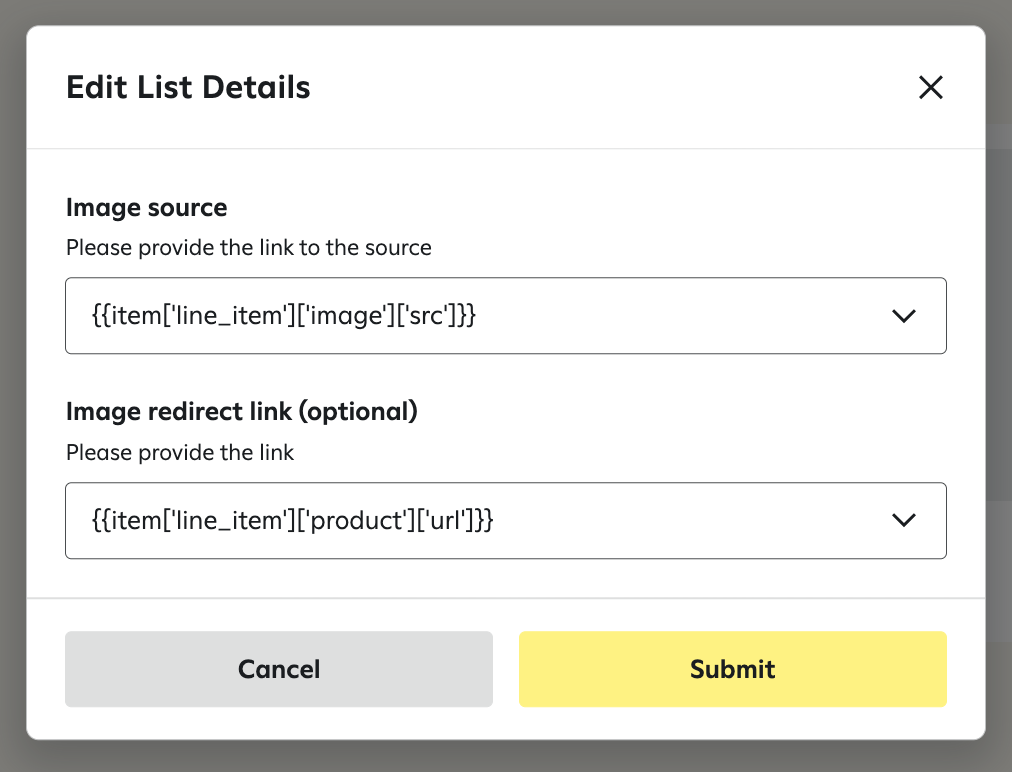
Use the drop down to select the variable source. Hit Submit when finished.
Repeat these steps for additional text desired on the product block, such as title, quantity, and price.
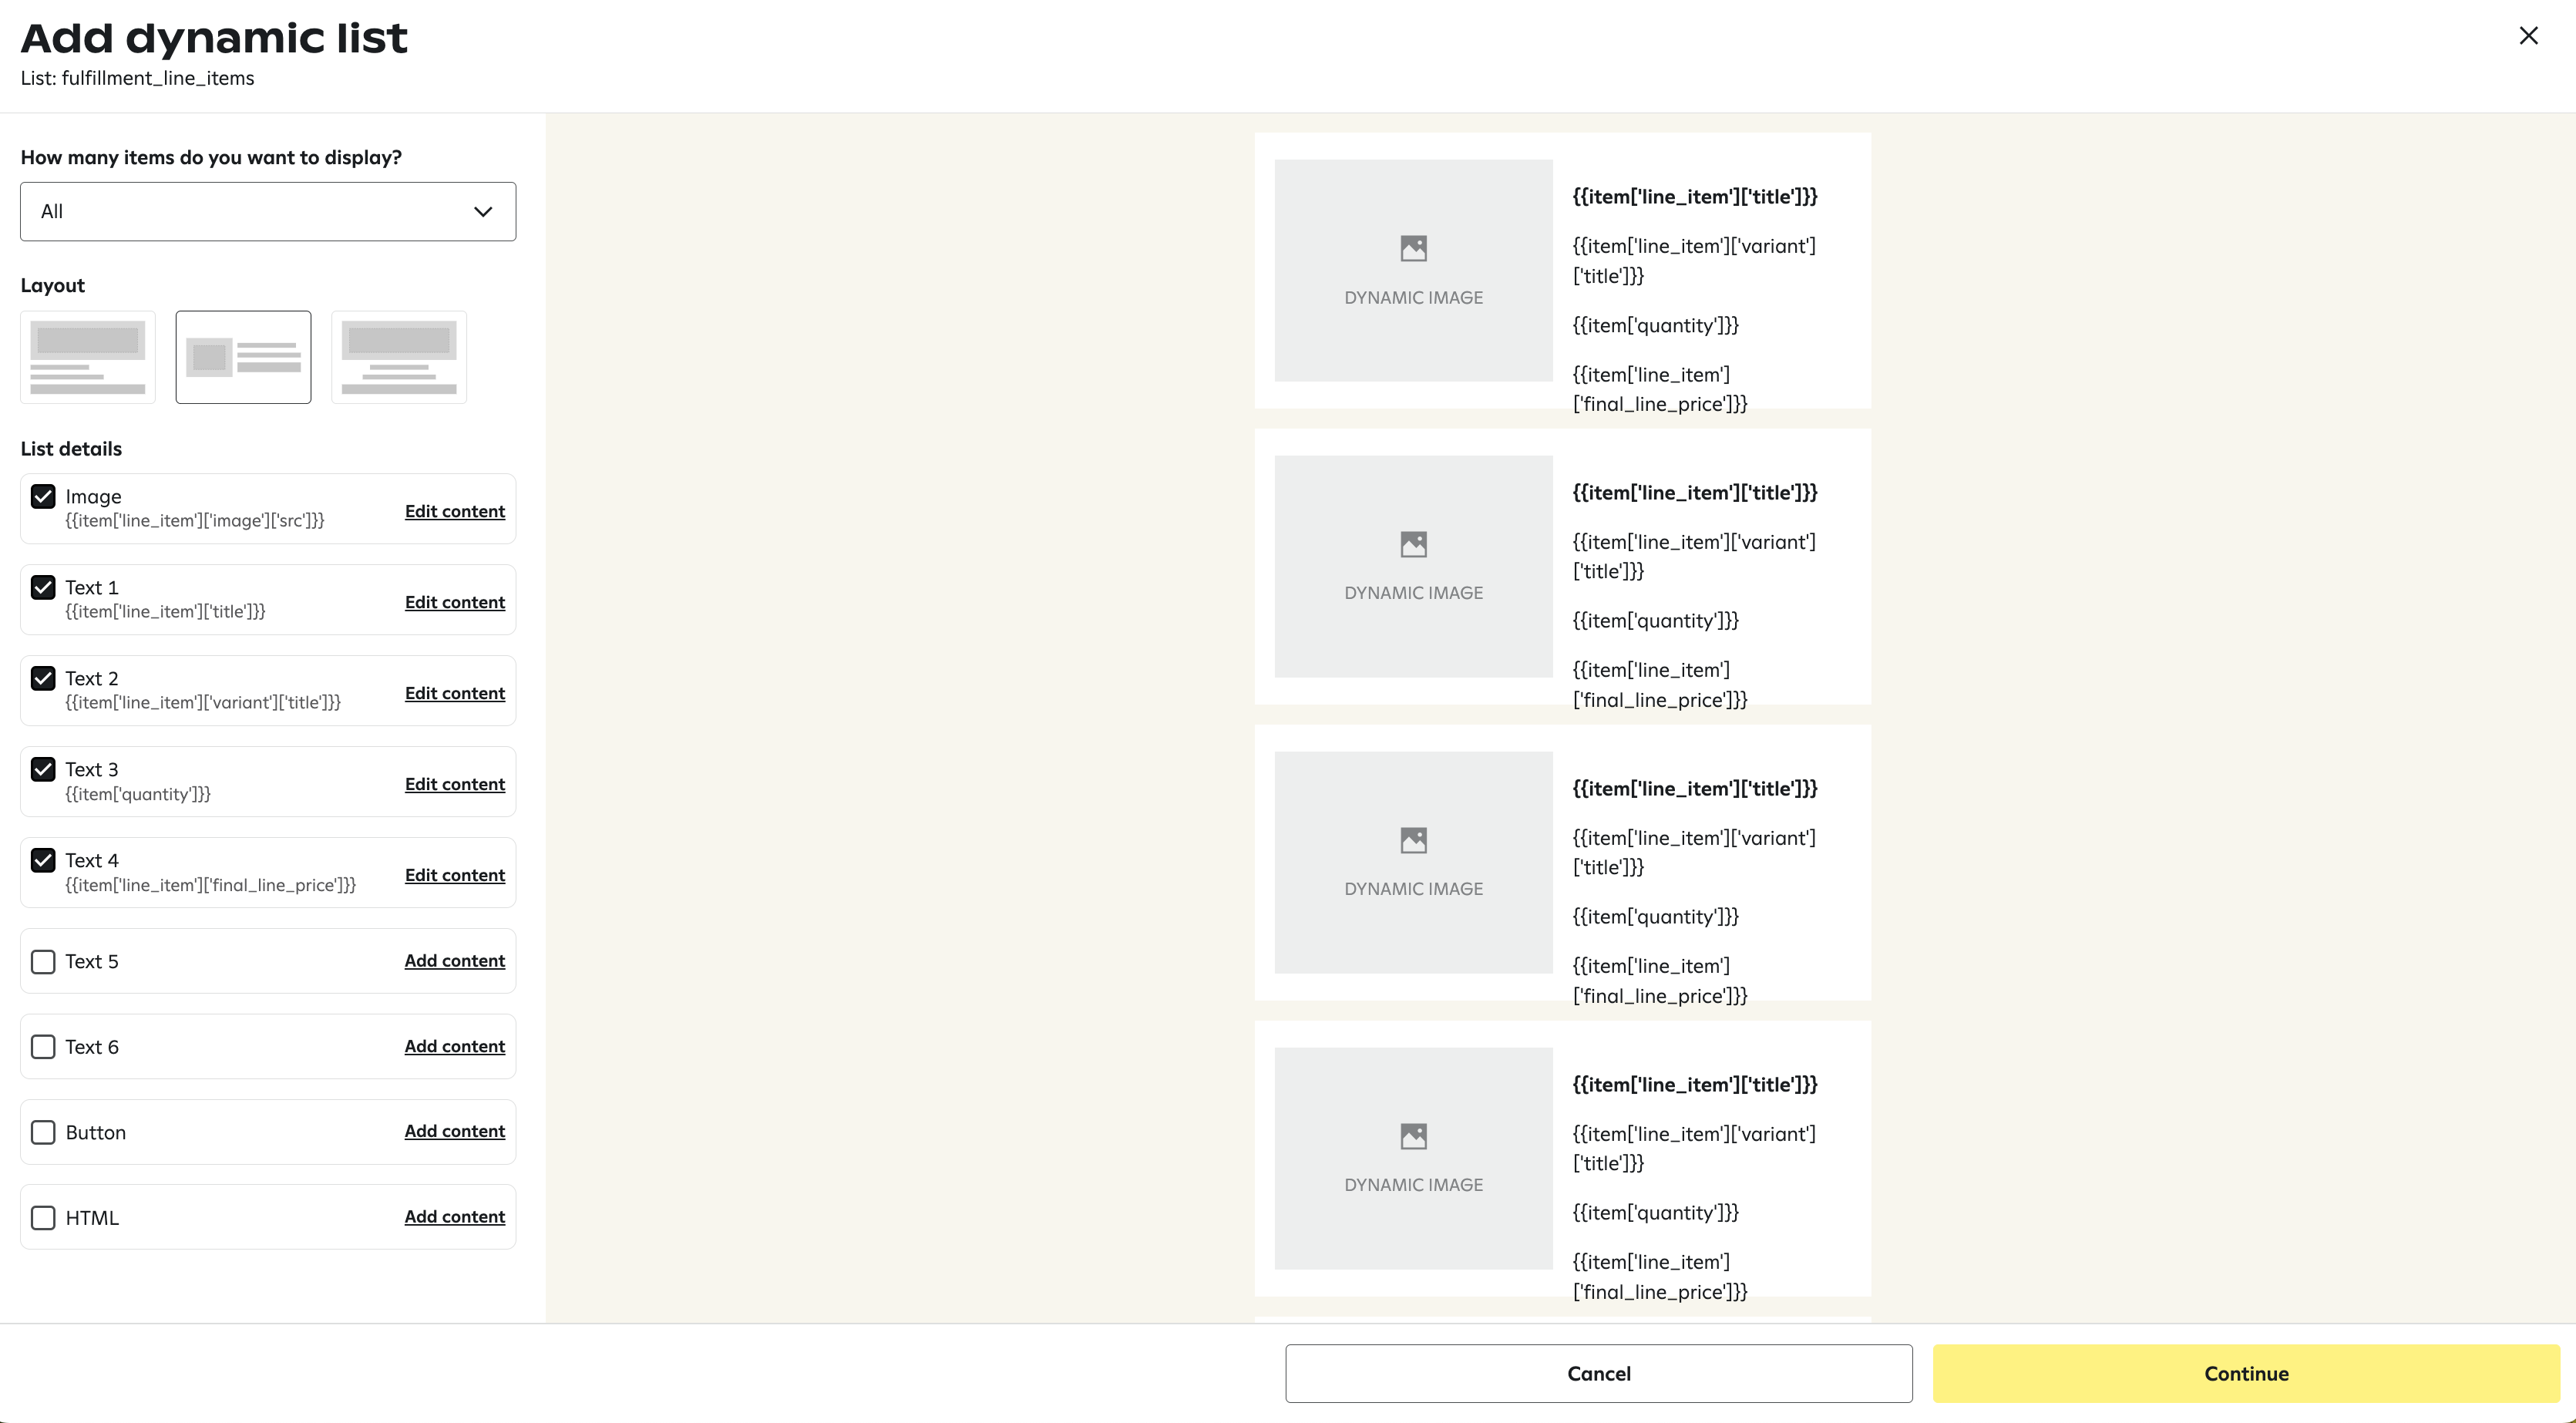
When finished, hit Continue.
Example HTML
Here’s an example of the HTML code for a product block section within the email:
{% for item in triggerEvent['custom']['order_meta']['shopify_order']['most_recent_fulfillment']['fulfillment_line_items'] %}

{{item['line_item']['image']['src']}}
{{item['line_item']['product']['url']}}

{{item['line_item']['title']}}
{{item['line_item']['variant']['title']}}
Quantity: {{item['quantity']}}
Total: {{triggerEvent.custom['order_meta']['shopify_order']['presentment_currency']}} {{item['line_item']['final_line_price']}}

{% endfor %}
Learn more about how to design emails and text messages using Malomo data with these articles:
