
Build Your Tracking Page with the Malomo Tracking Page Creator
Malomo’s Tracking Page Creator is a lightning fast method to create and customize a branded tracking page within your Shopify theme. With two clicks, your new tracking page can be up and running!
Start directing customers to your page immediately or easily add existing theme sections, branding elements, assets and other Shopify apps. You can also get creative and create multiple tracking pages in order to segment your tracking experiences based on buyer data.
With our new Tracking Page Creator, you can:
Spin up a functional tracking page in just a few minutes. Your new tracking page includes the following content out-of-the-box:
Your store header
Malomo banner section
Placeholder banner image
Malomo Shipment Tracker block
Your store footer
Skip the manual steps of creating a new API key, creating a new Shopify page and assigning a template, adding our theme app block to your page, adding custom code to support a banner image, and more.
Create tracking pages on both published and unpublished Shopify themes.
Use Shopify’s theme editor to customize your page and add additional content.
Create multiple tracking pages and manage them within the Malomo dashboard.
This guide will help you create your new tracking page, answer common questions, and tell you what to expect during beta.
Article Contents:
How to Create Your Tracking Page
Requirements
You will not be able to create tracking pages until you have updated the permissions for our Shopify integration. If you see a prompt at the top of the Tracking Page Creator page, click the button to make any necessary updates using your Shopify credentials.
For new customers
Enable and authorize the Shopify integration via the Apps page.
For existing customers
Ensure your Shopify integration is up-to-date.
We require additional API permissions for your Shopify integration (why do you need this?).
If needed, you will be prompted to update your integration when you land on the Tracking Page Creator in the Malomo dashboard.
You may not see this prompt if you have recently installed or reinstalled the Shopify integration.
Instructions
1. Navigate to the Tracking Page Creator section within the Malomo platform.
2. Click the Create a Tracking Page button to get started.
3. Enter the following details in the modal window:
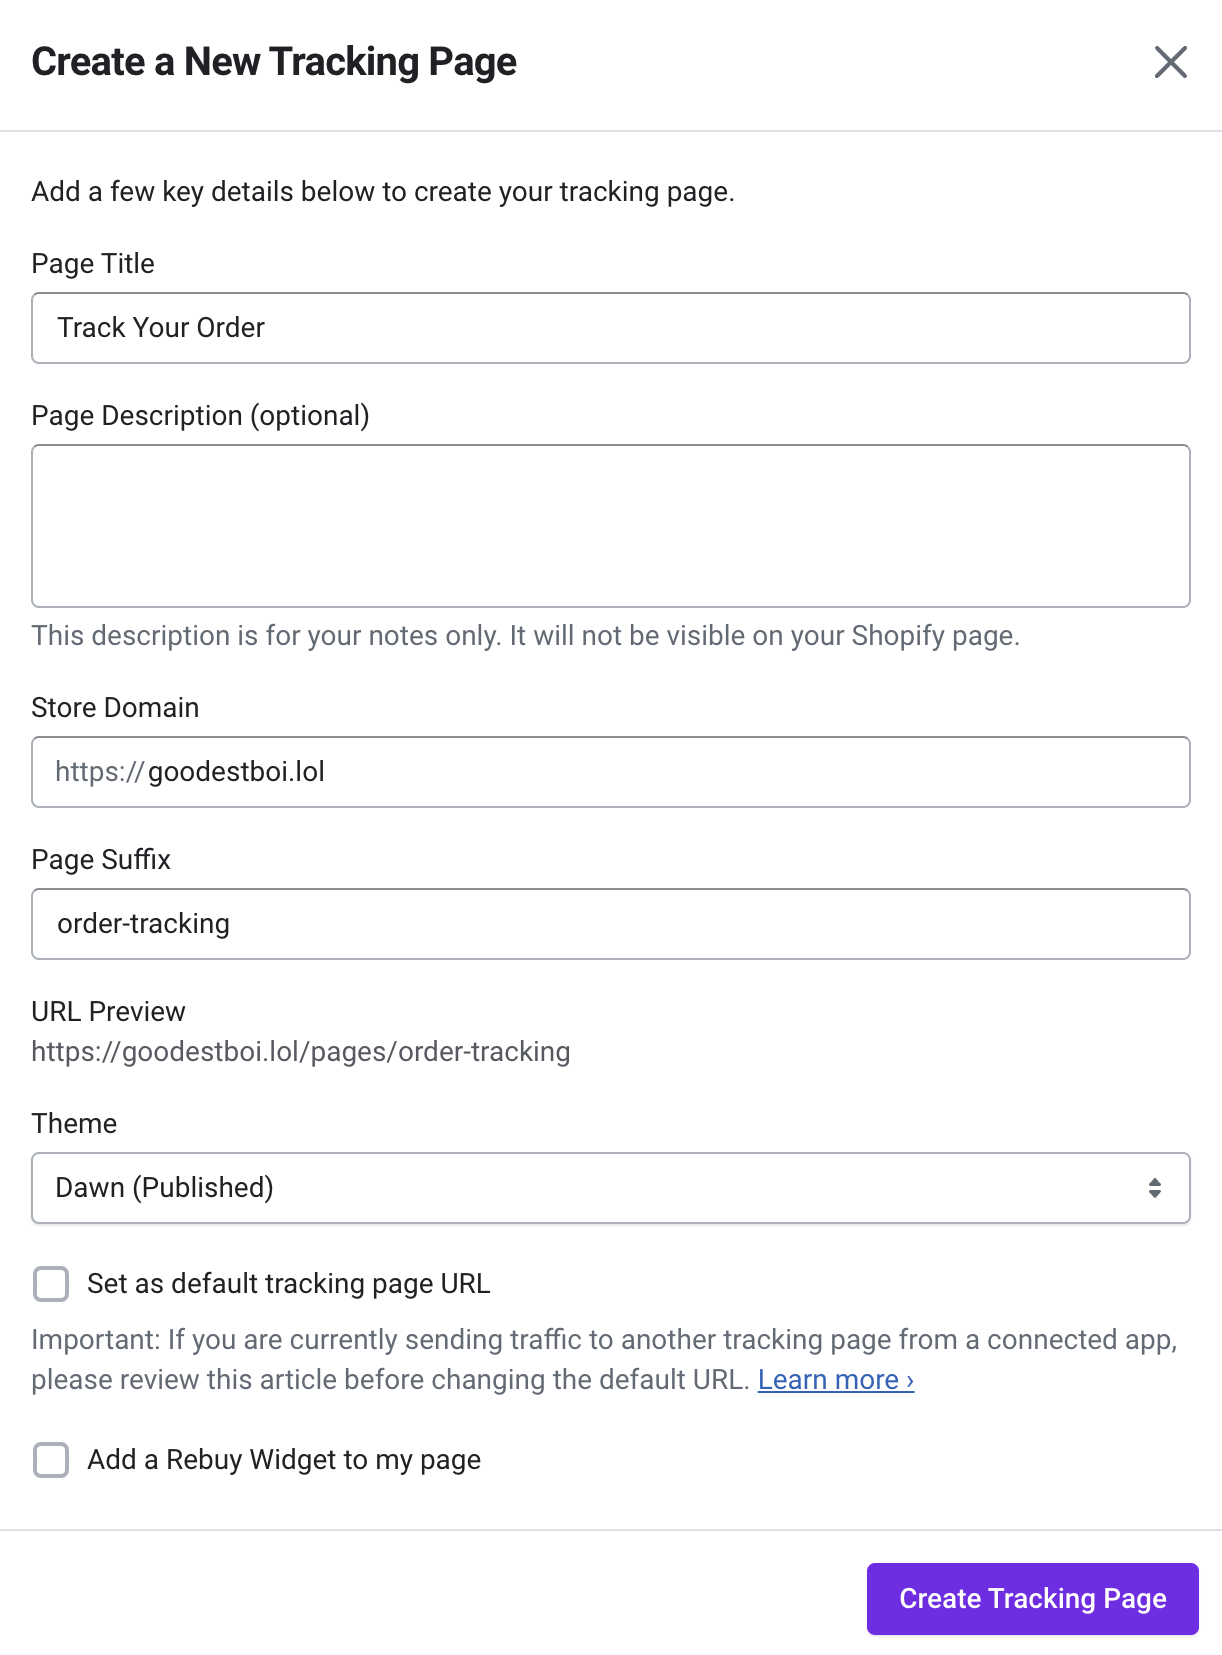
Page Title
We suggest something simple and straightforward like “Track Your Order” or “Order Tracking”.
Page Description (optional)
This field is for your notes only and is not shared with Shopify. Use this field to add any helpful notes for you or your teammates, especially if you create multiple tracking pages.
Store Domain
We will auto populate this field for you. If your store has multiple domains, make sure to pick the appropriate domain from the list. If you do not see your desired domain in the list, you can edit the suggested domain in the input field.
Page Suffix
This is the final piece of your new tracking page URL. Again, we suggest something simple and straightforward like “order-tracking”.
URL Preview
This is a preview of your new tracking page URL based on the text entered in the Store Domain and Page Suffix fields.
Theme
Select the Shopify theme you’d like to create your tracking page on. Your current published theme is selected by default.
Please note: You cannot create a tracking page on a trial theme that you are previewing.
Set as default tracking page URL (what’s this?)
Check this box if this is your first Malomo tracking page.
Uncheck this box if you are already directing traffic to a different tracking page and are not ready to switch to your new page.
You can change this setting later by following these steps.
Please note: If you create your tracking page on an unpublished theme, you cannot set it as your default tracking page URL until the theme is published.
Add a Rebuy Widget
This option will display if your store is associated with a Rebuy account. Check the box to include a Rebuy app block on your tracking page.
4. Click the Create Tracking Page button to generate your new page. You will see a success message and the details of your new page will appear in a list.
5. Preview your live page. Click the Preview link to see your live tracking page.
Please note: Tracking pages created on unpublished themes cannot be previewed.
6. Customize your page in Shopify’s theme editor by clicking the Customize My Page button.
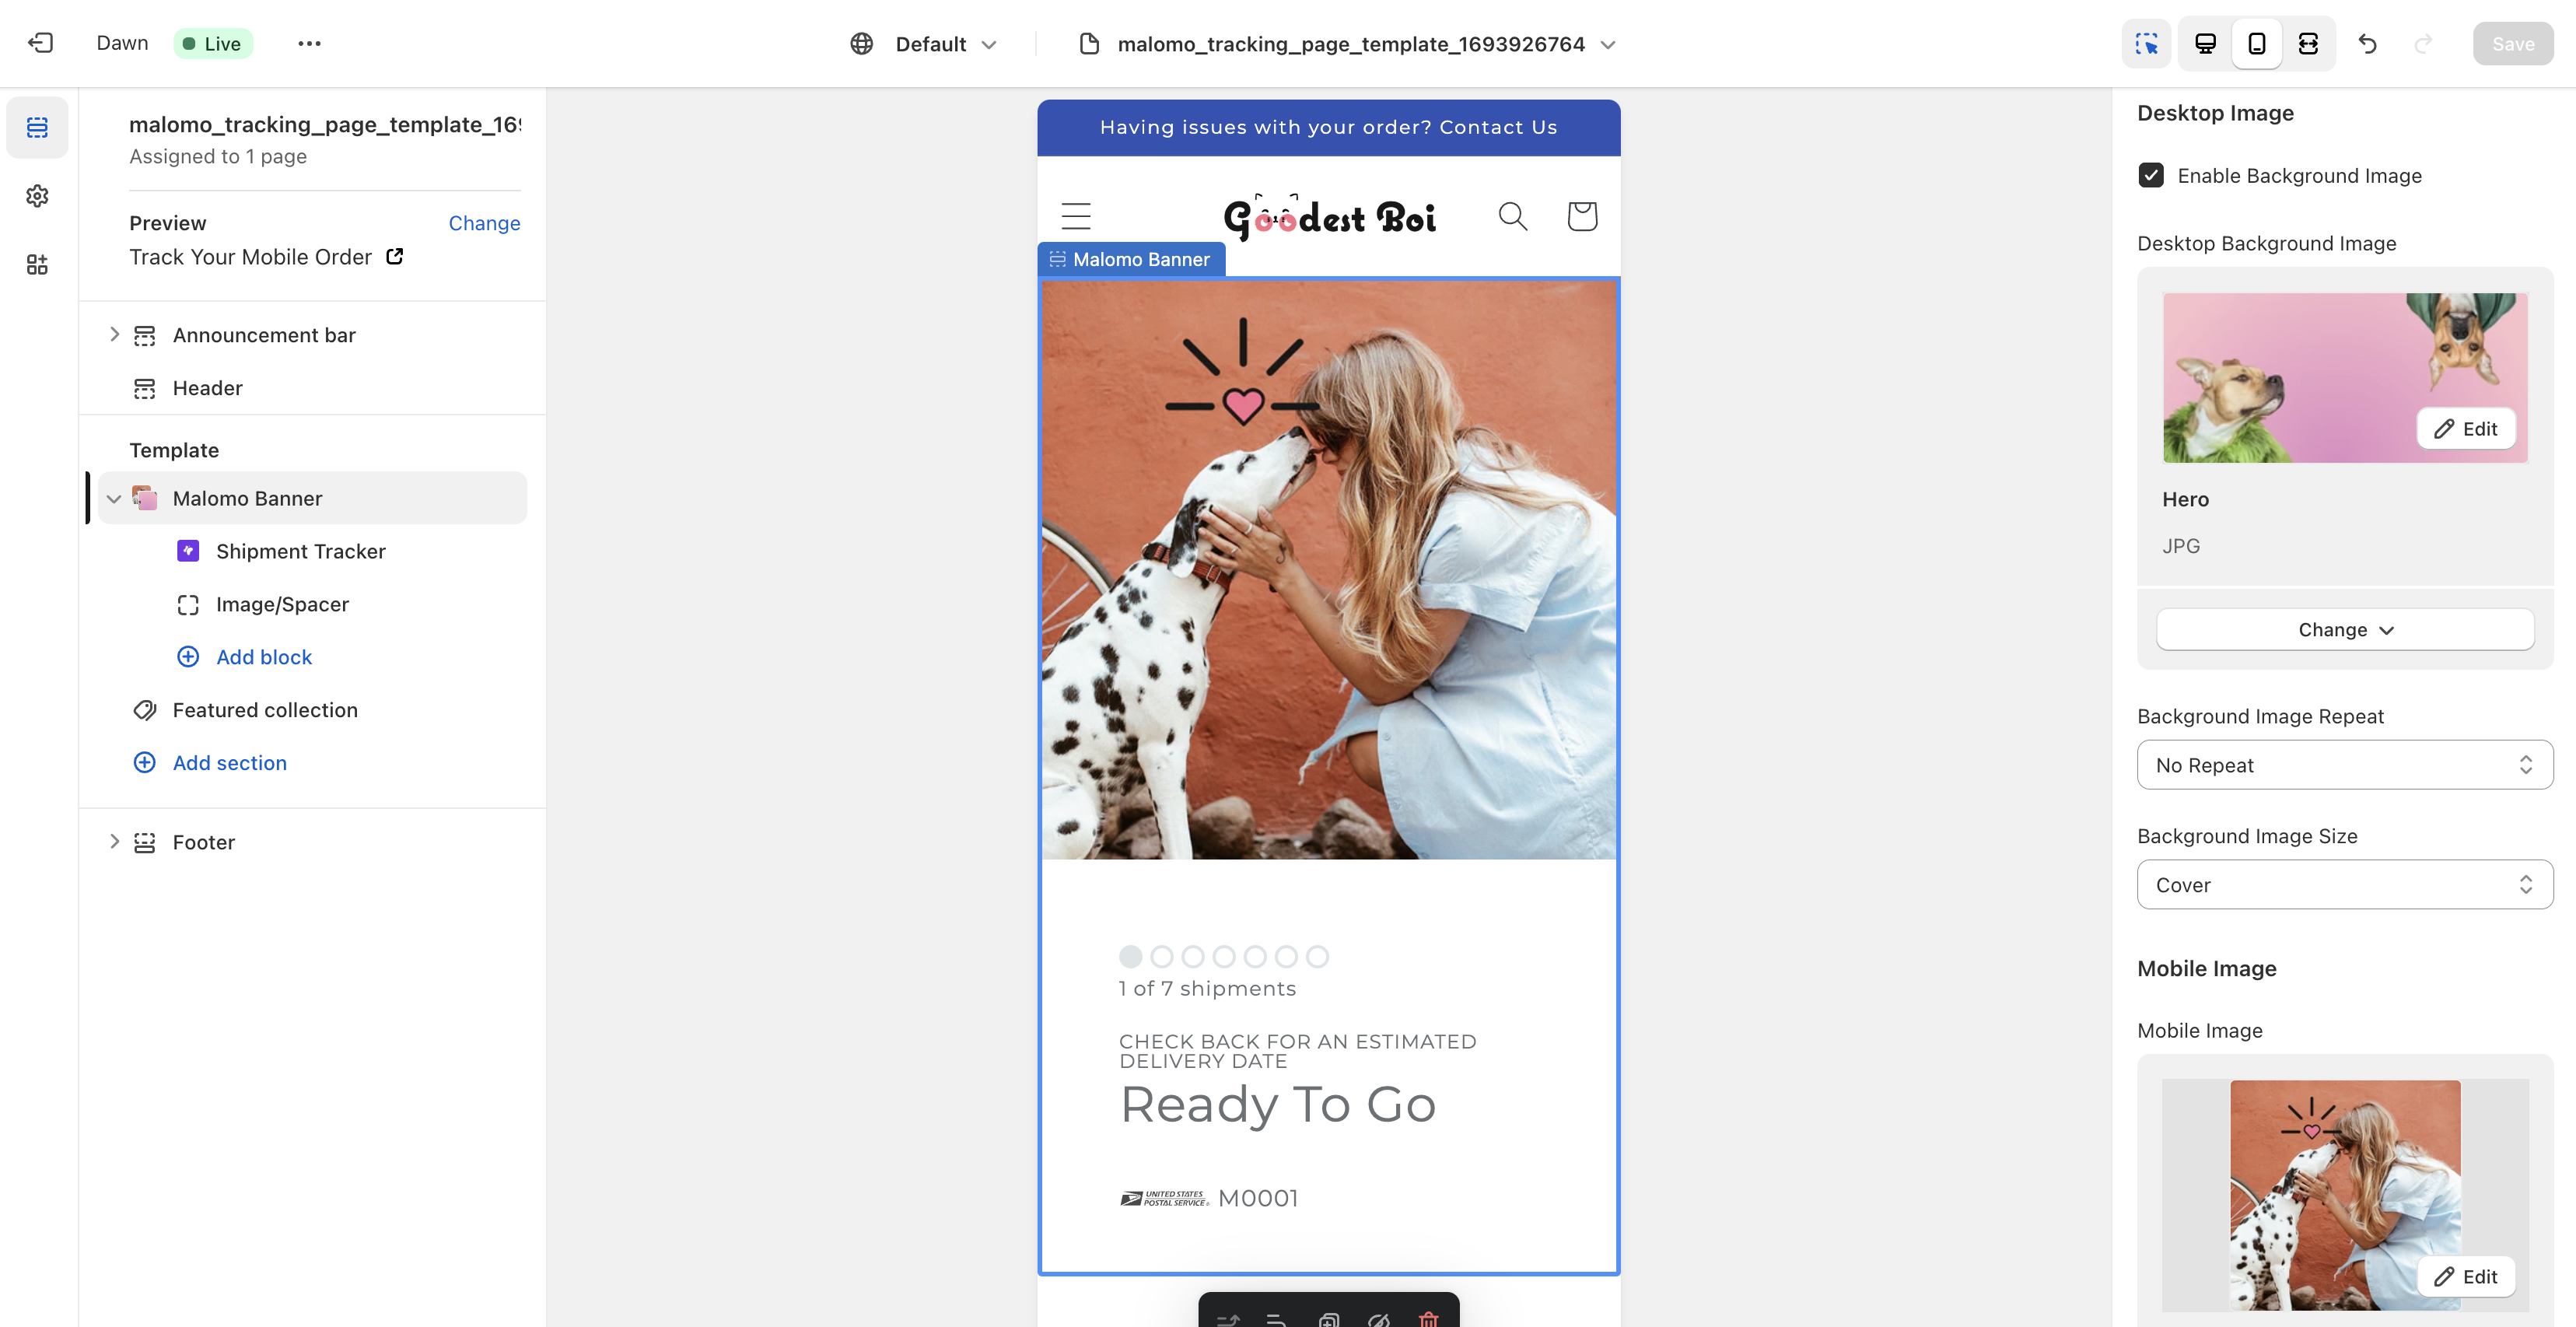
Replace the default banner image
From the Layers panel, click on Malomo banner
From the Settings panel, you’ll see Desktop Image and Mobile Image sections at the top of the options list. Add a new image to the desktop and mobile image sections and adjust any related settings. If a mobile image is not selected, a tracking block only with no image will appear when viewed on a mobile device.

Desktop Image Example
Mobile Image Example
Style the tracking block
Customize the look of the tracker by editing the options in the Buttons and Inputs sections. Make sure to change the element selector between Shipment Tracker and Order Lookup Tracker to customize all options. Learn more about customization options here.
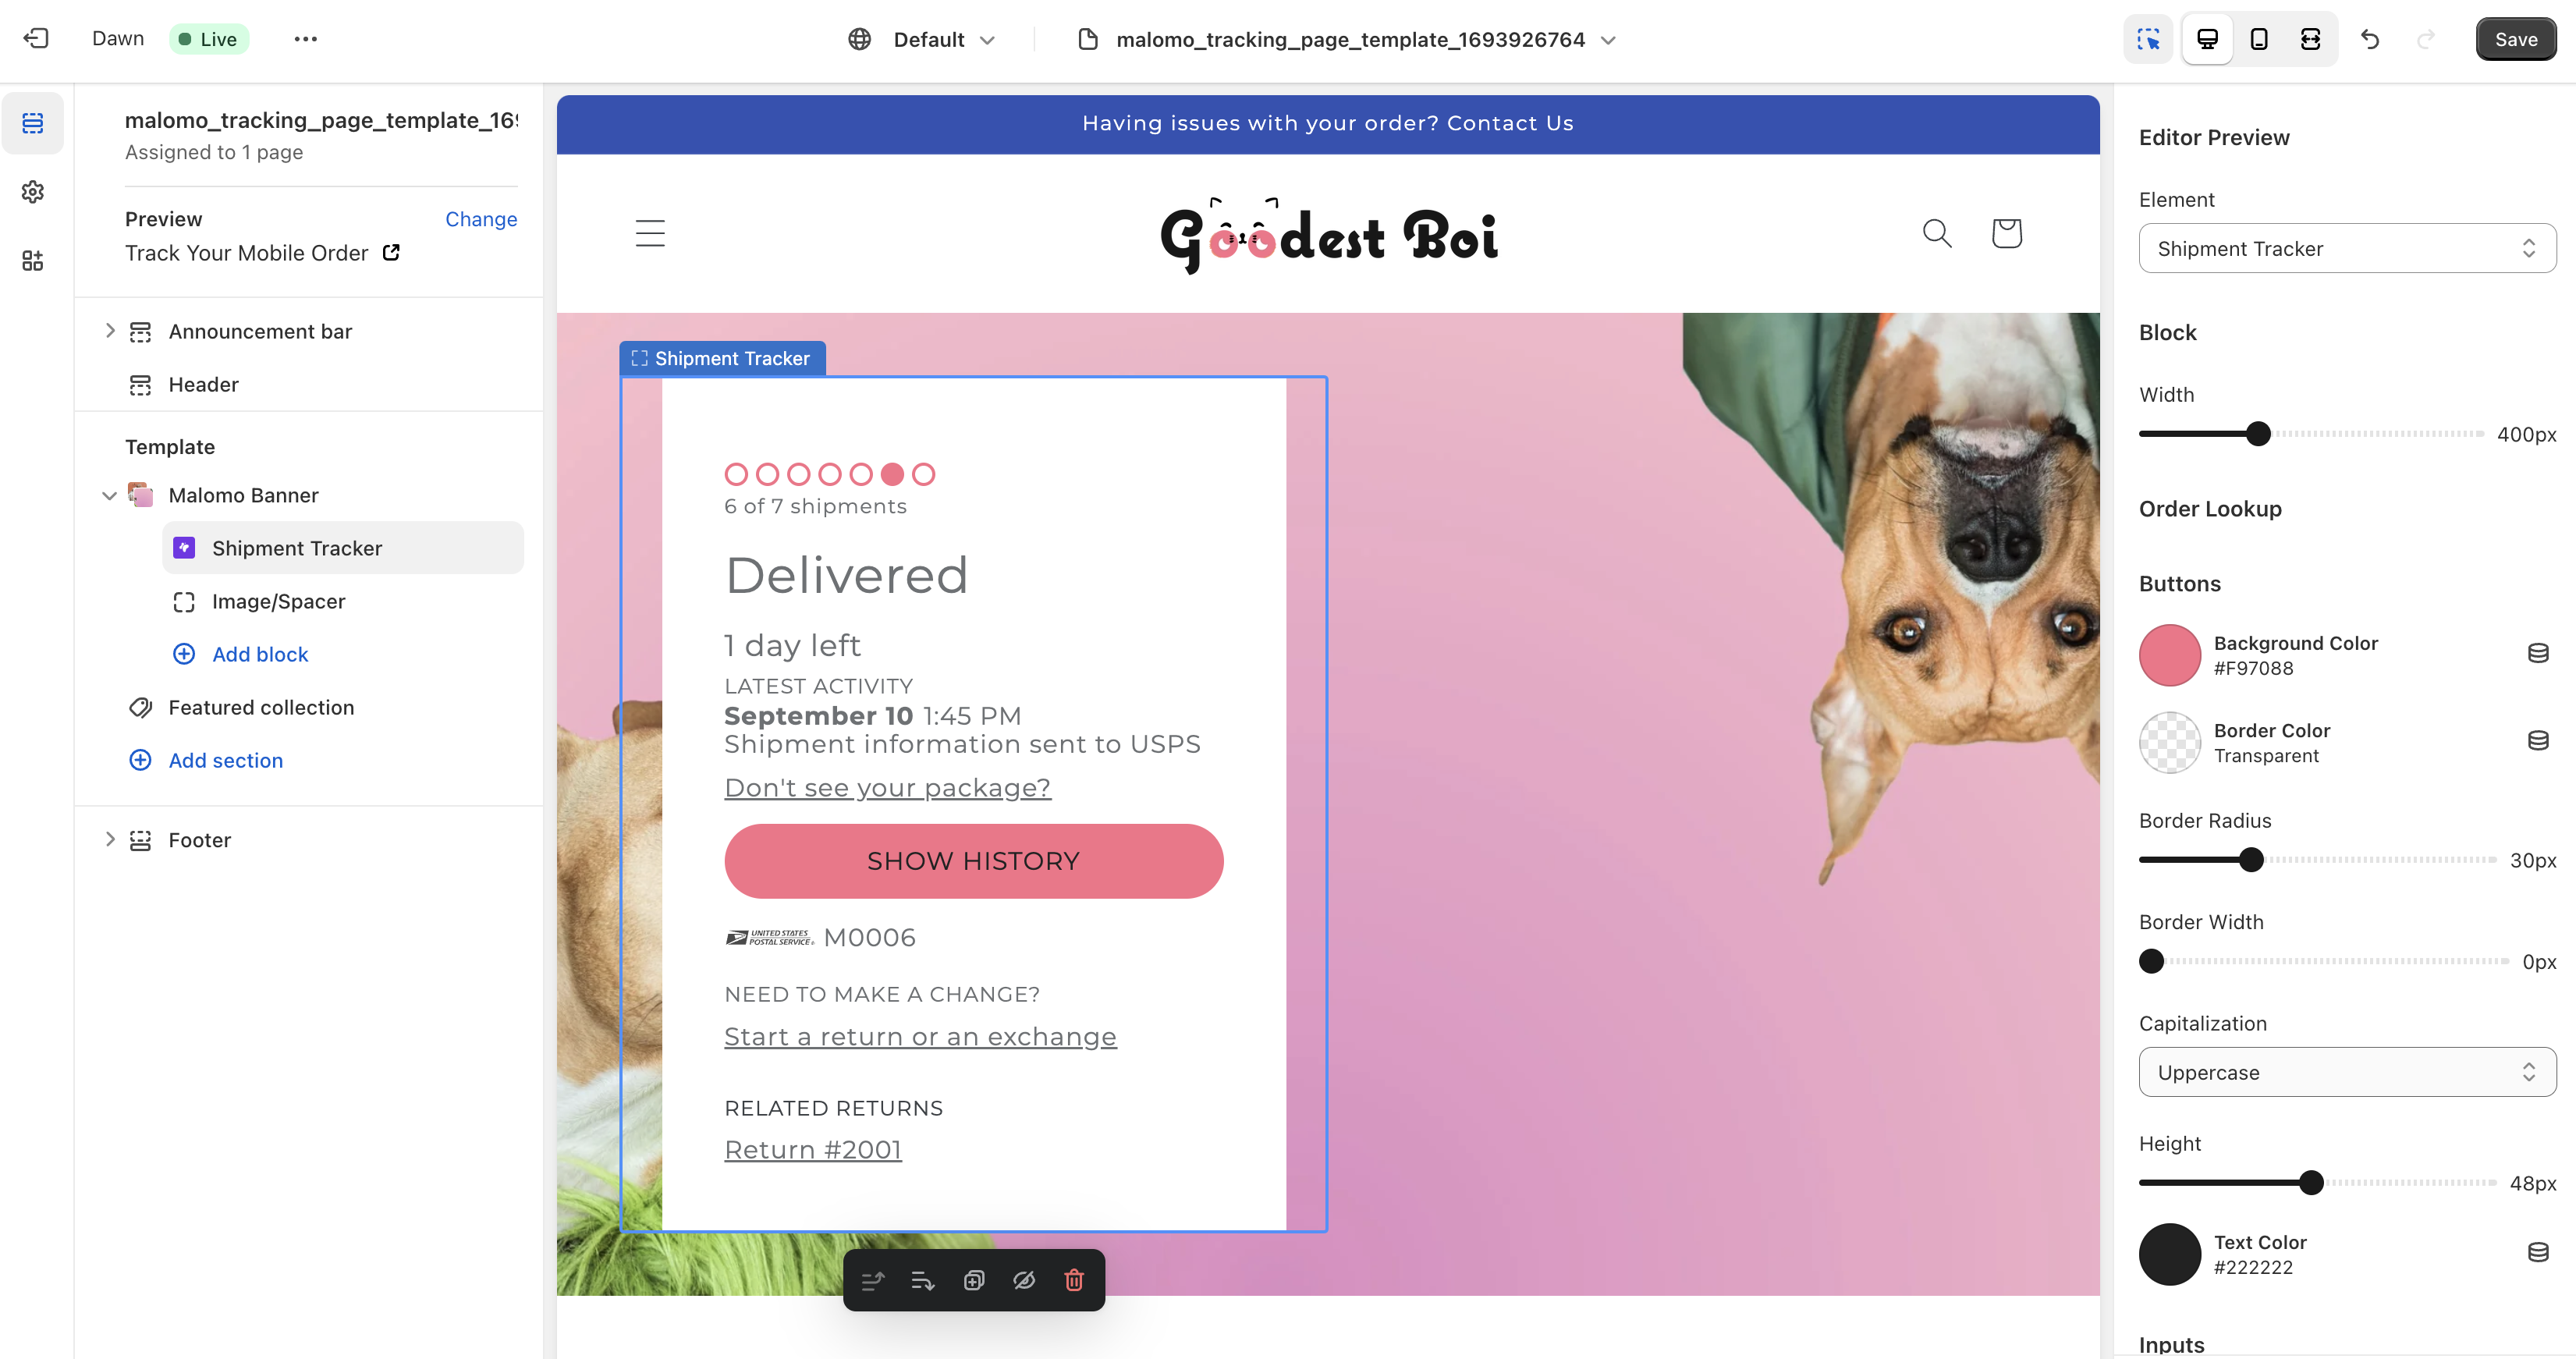
Shipment Tracker Customization Example
Add your Rebuy Widget ID
If you chose to include a Rebuy app block on your tracking page, you’ll need to add a widget ID before you see any content. You can find your widget ID in the Rebuy platform on the Widgets page.
From the Layers panel, click on Apps › Rebuy Widget
In the Settings panel, enter your Rebuy Widget ID in the Widget ID field
Click Save to populate the app block content
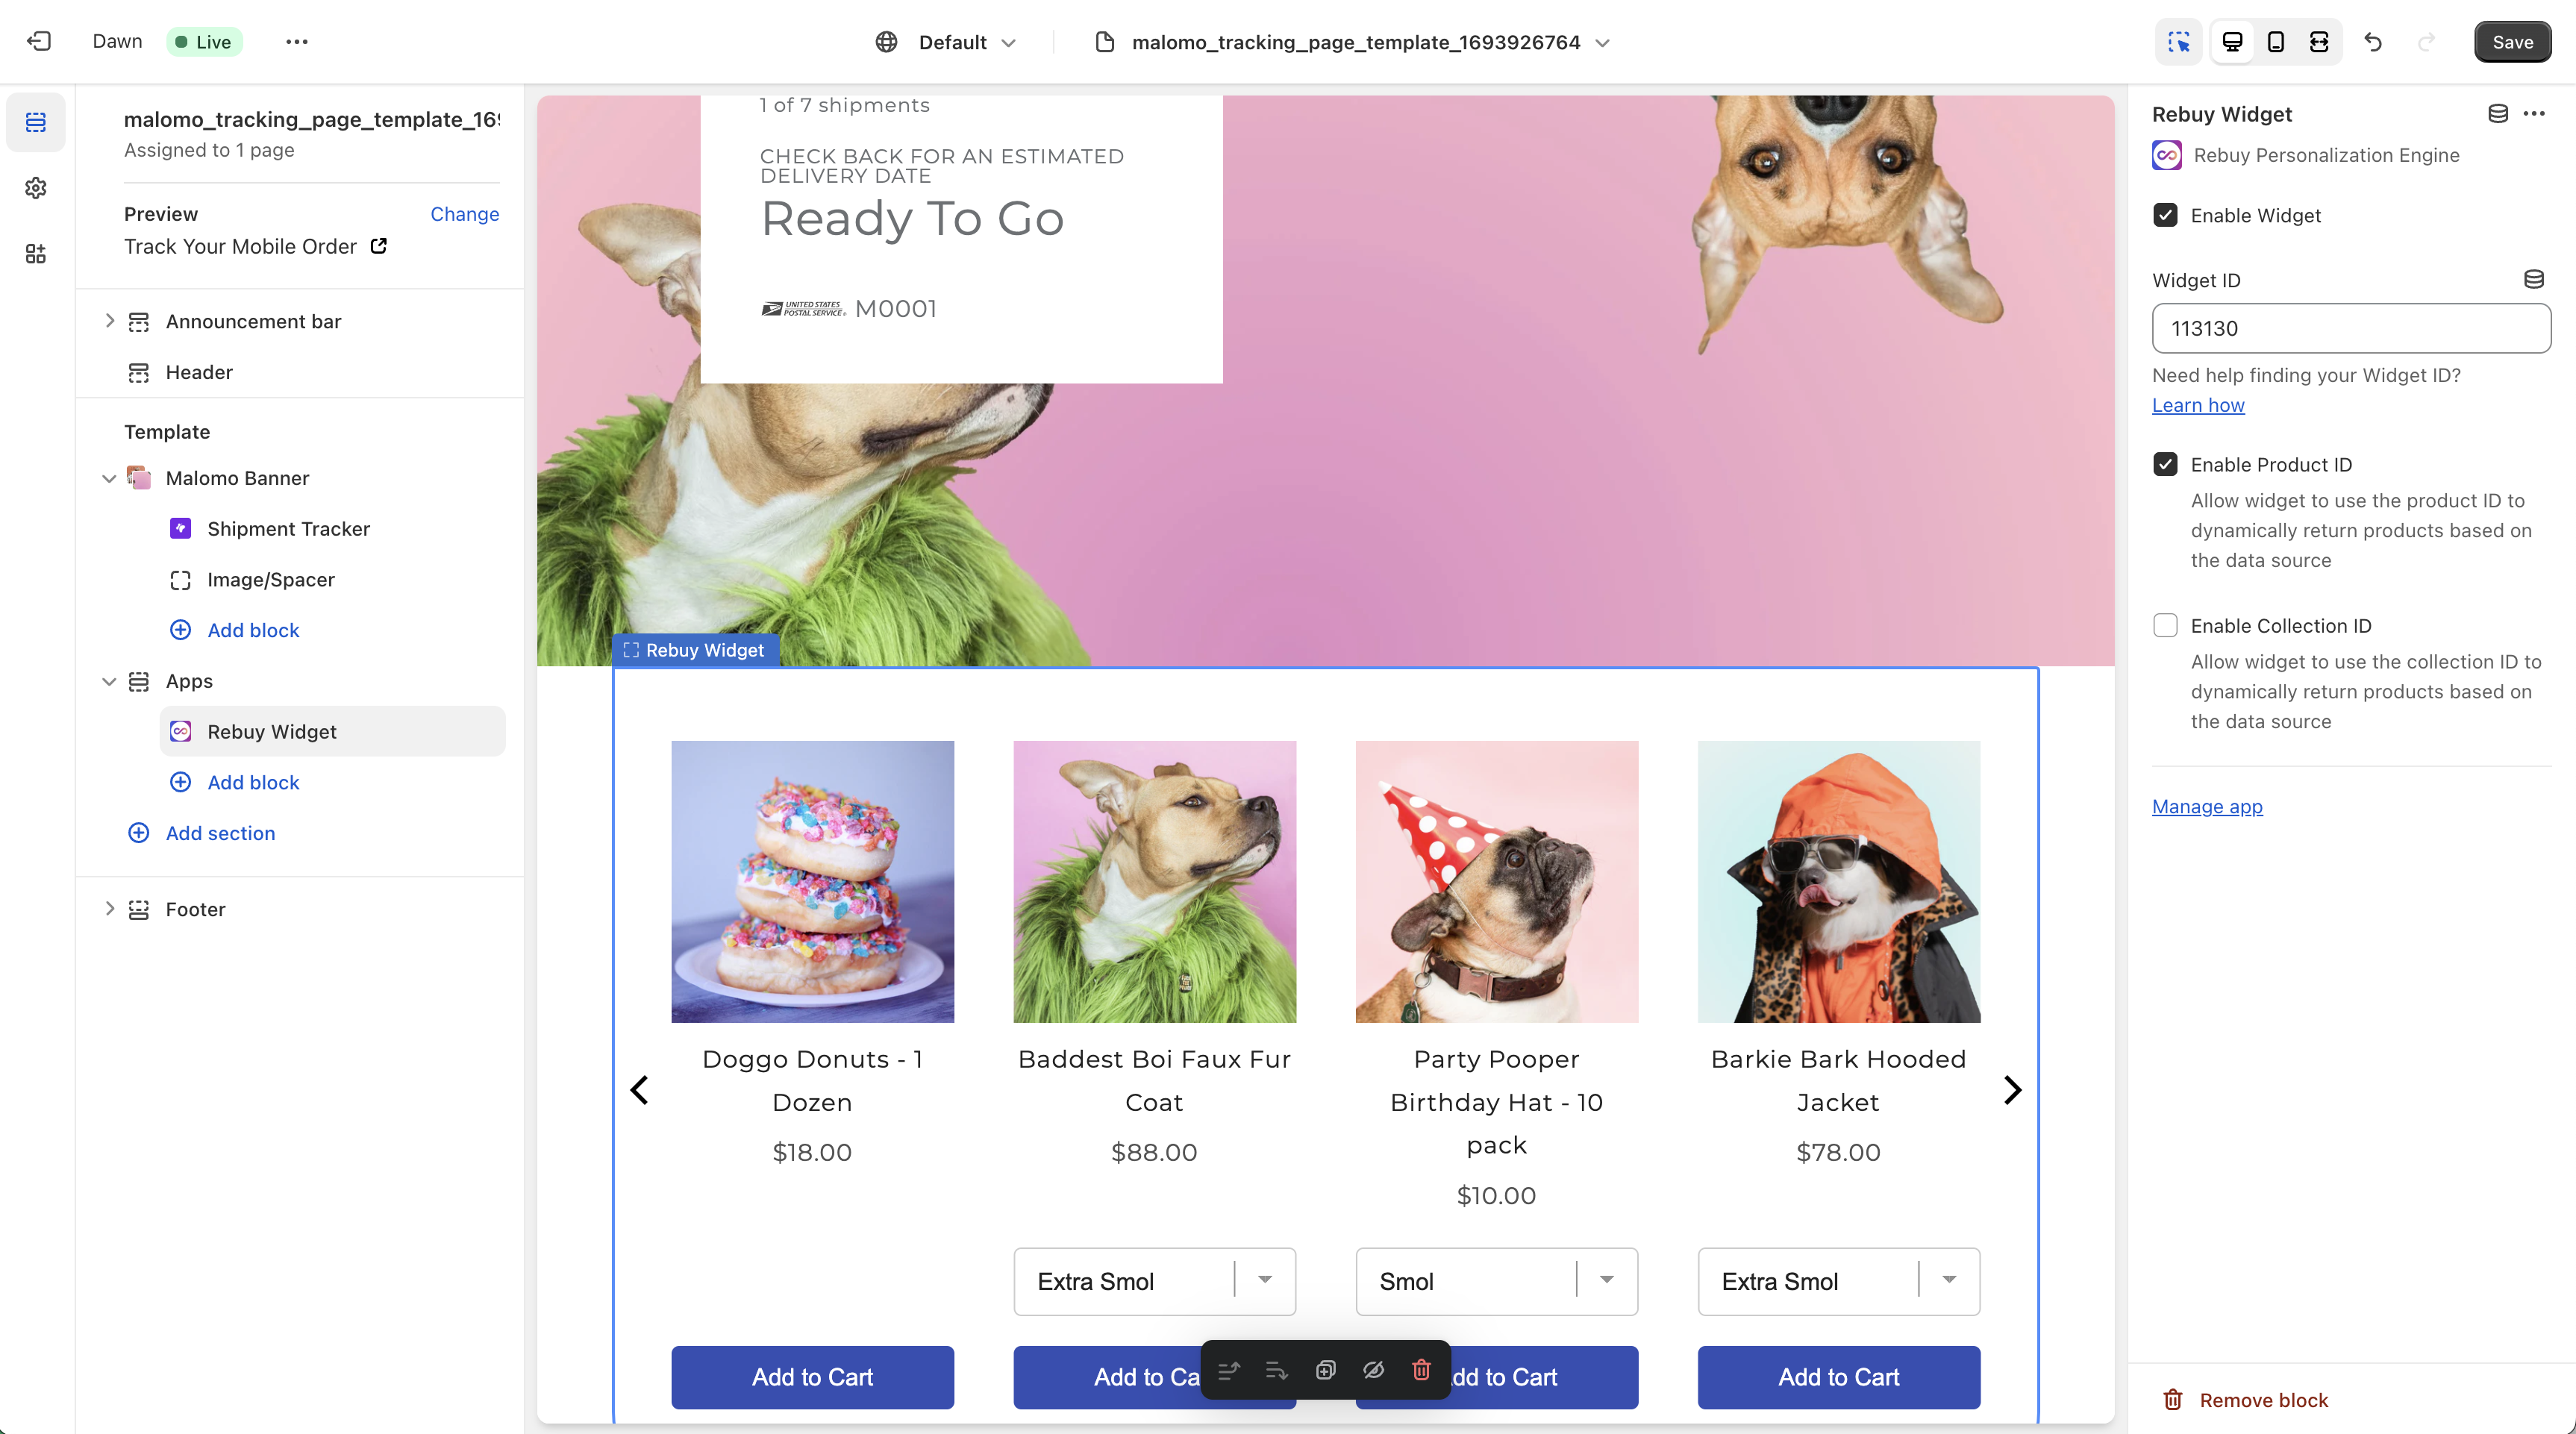
Adding Your Rebuy Widget ID
7. Save your changes and preview your page.
8. Add desired additional page content using your theme editor. Looking for inspiration? Check out some of our favorite tracking page examples from other Malomo customers in our Post Purchase Plays section within the dashboard or on our Inspiration page on our main site.
9. Once you’re ready to direct customers to your new page, please set the default tracking page URL if you haven’t already. Our integrations use the Default Tracking Page URL to generate dynamic tracking page links within all of your connected apps.
FAQ
Why do you need additional Shopify API permissions?
The Tracking Page Creator requires additional API access scopes in order to create and manage pages, page templates, and page content on your behalf.
What is the default tracking page URL?
Our integrations use the Default Tracking Page URL to generate dynamic tracking page links within all of your connected apps via the order.url variable.
Learn more about using this variable to link to your tracking page in your connected apps.
How do I set a tracking page as the default tracking page URL?
If you are ready to start directing traffic to a tracking page you created using the Tracking Page Creator, follow these steps:
Find the desired tracking page in your list of tracking pages
Click the icon in the upper right corner of the page details card
Click “Set as default tracking page URL” from the options
You will see a success message when your default tracking page URL is updated
How do I know which tracking page is set as the default tracking page URL?
In your tracking pages list, your default tracking page is denoted with a star icon to the right of its page title.