Integrating Malomo and Gorgias
Introduction:
Set up Time: 15-30 Minutes
Prerequisites: Your Malomo Account needs to be connected with Shopify.
The Malomo + Gorgias integration empowers Merchants to quickly retrieve the status of an Order’s Shipment and display the most recent Malomo information in a Gorgias widget. Gorgias customers can take advantage of using Malomo data to make better informed responses to their customers, reducing the time it takes to solve issues.
The Malomo<> Gorgias integration will allow a Merchant to retrieve all order data Malomo has access to which includes Shopify Order data, Customer Information, Shipping Destination, and the last shipping event Malomo has received from a Carrier.
Step 1: Generate Your API Key
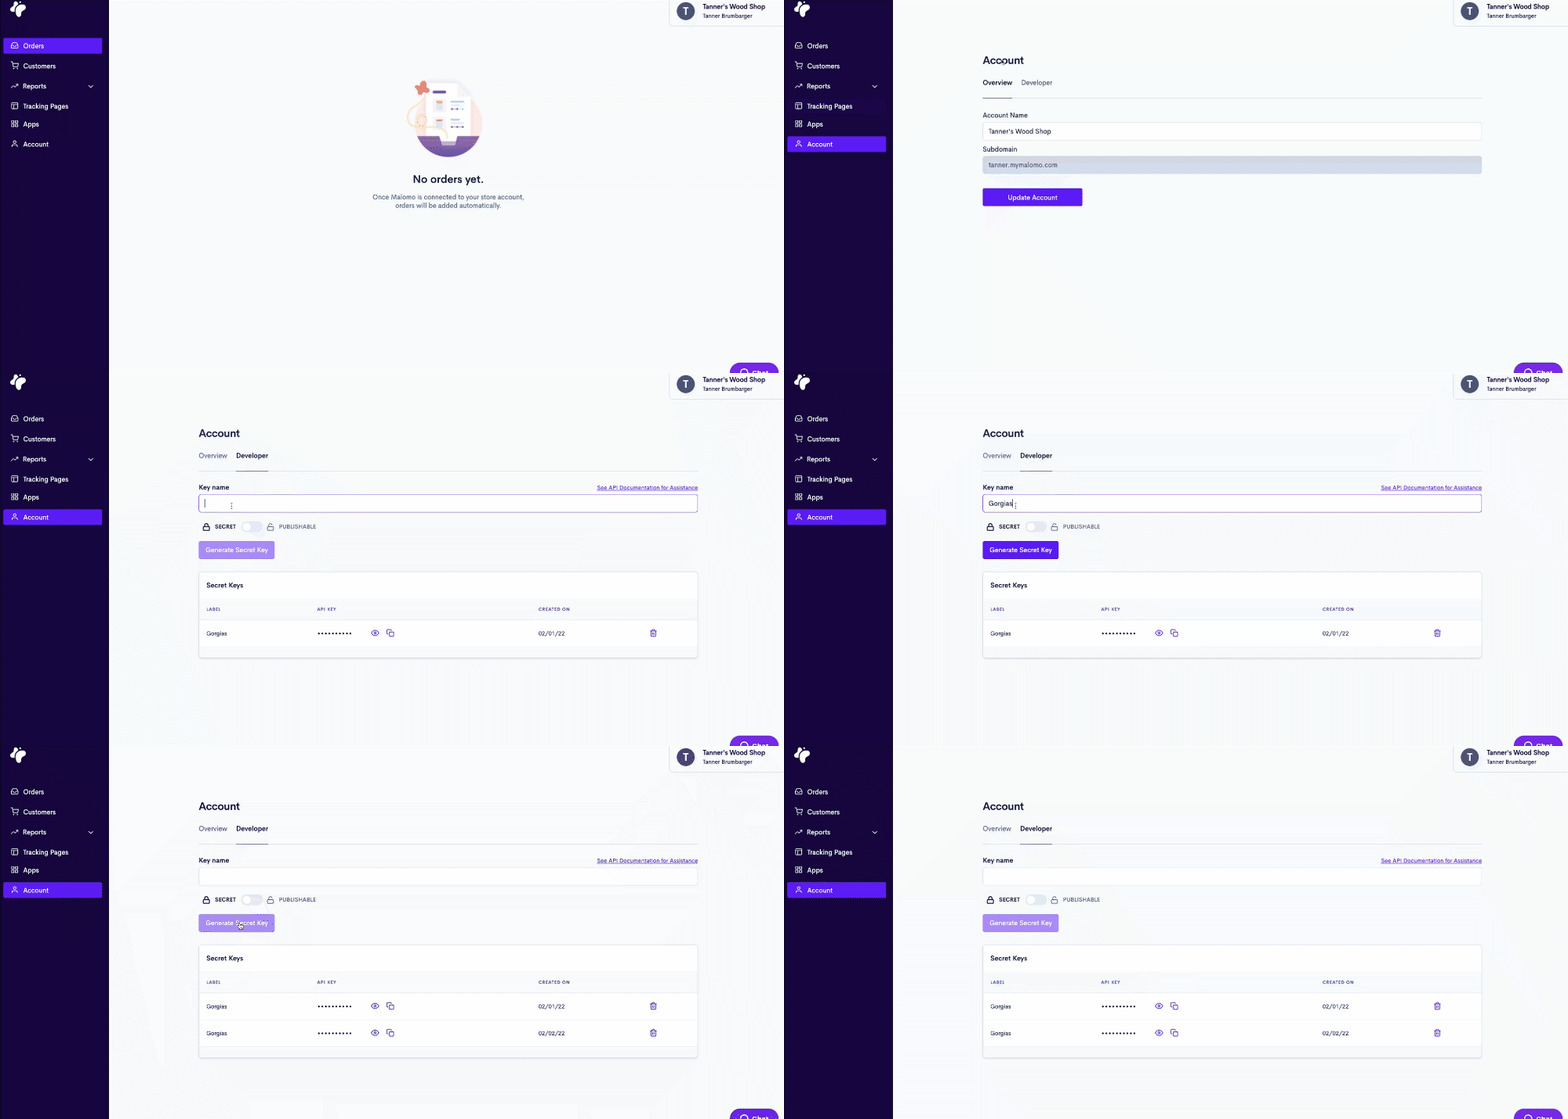
Generate a Secret Malomo API Key on Malomo’s Developer Page and name it ‘Gorgias’. Save this key for the end of step 2.

Step 2: Setup & Authenticate Malomo & Gorgias
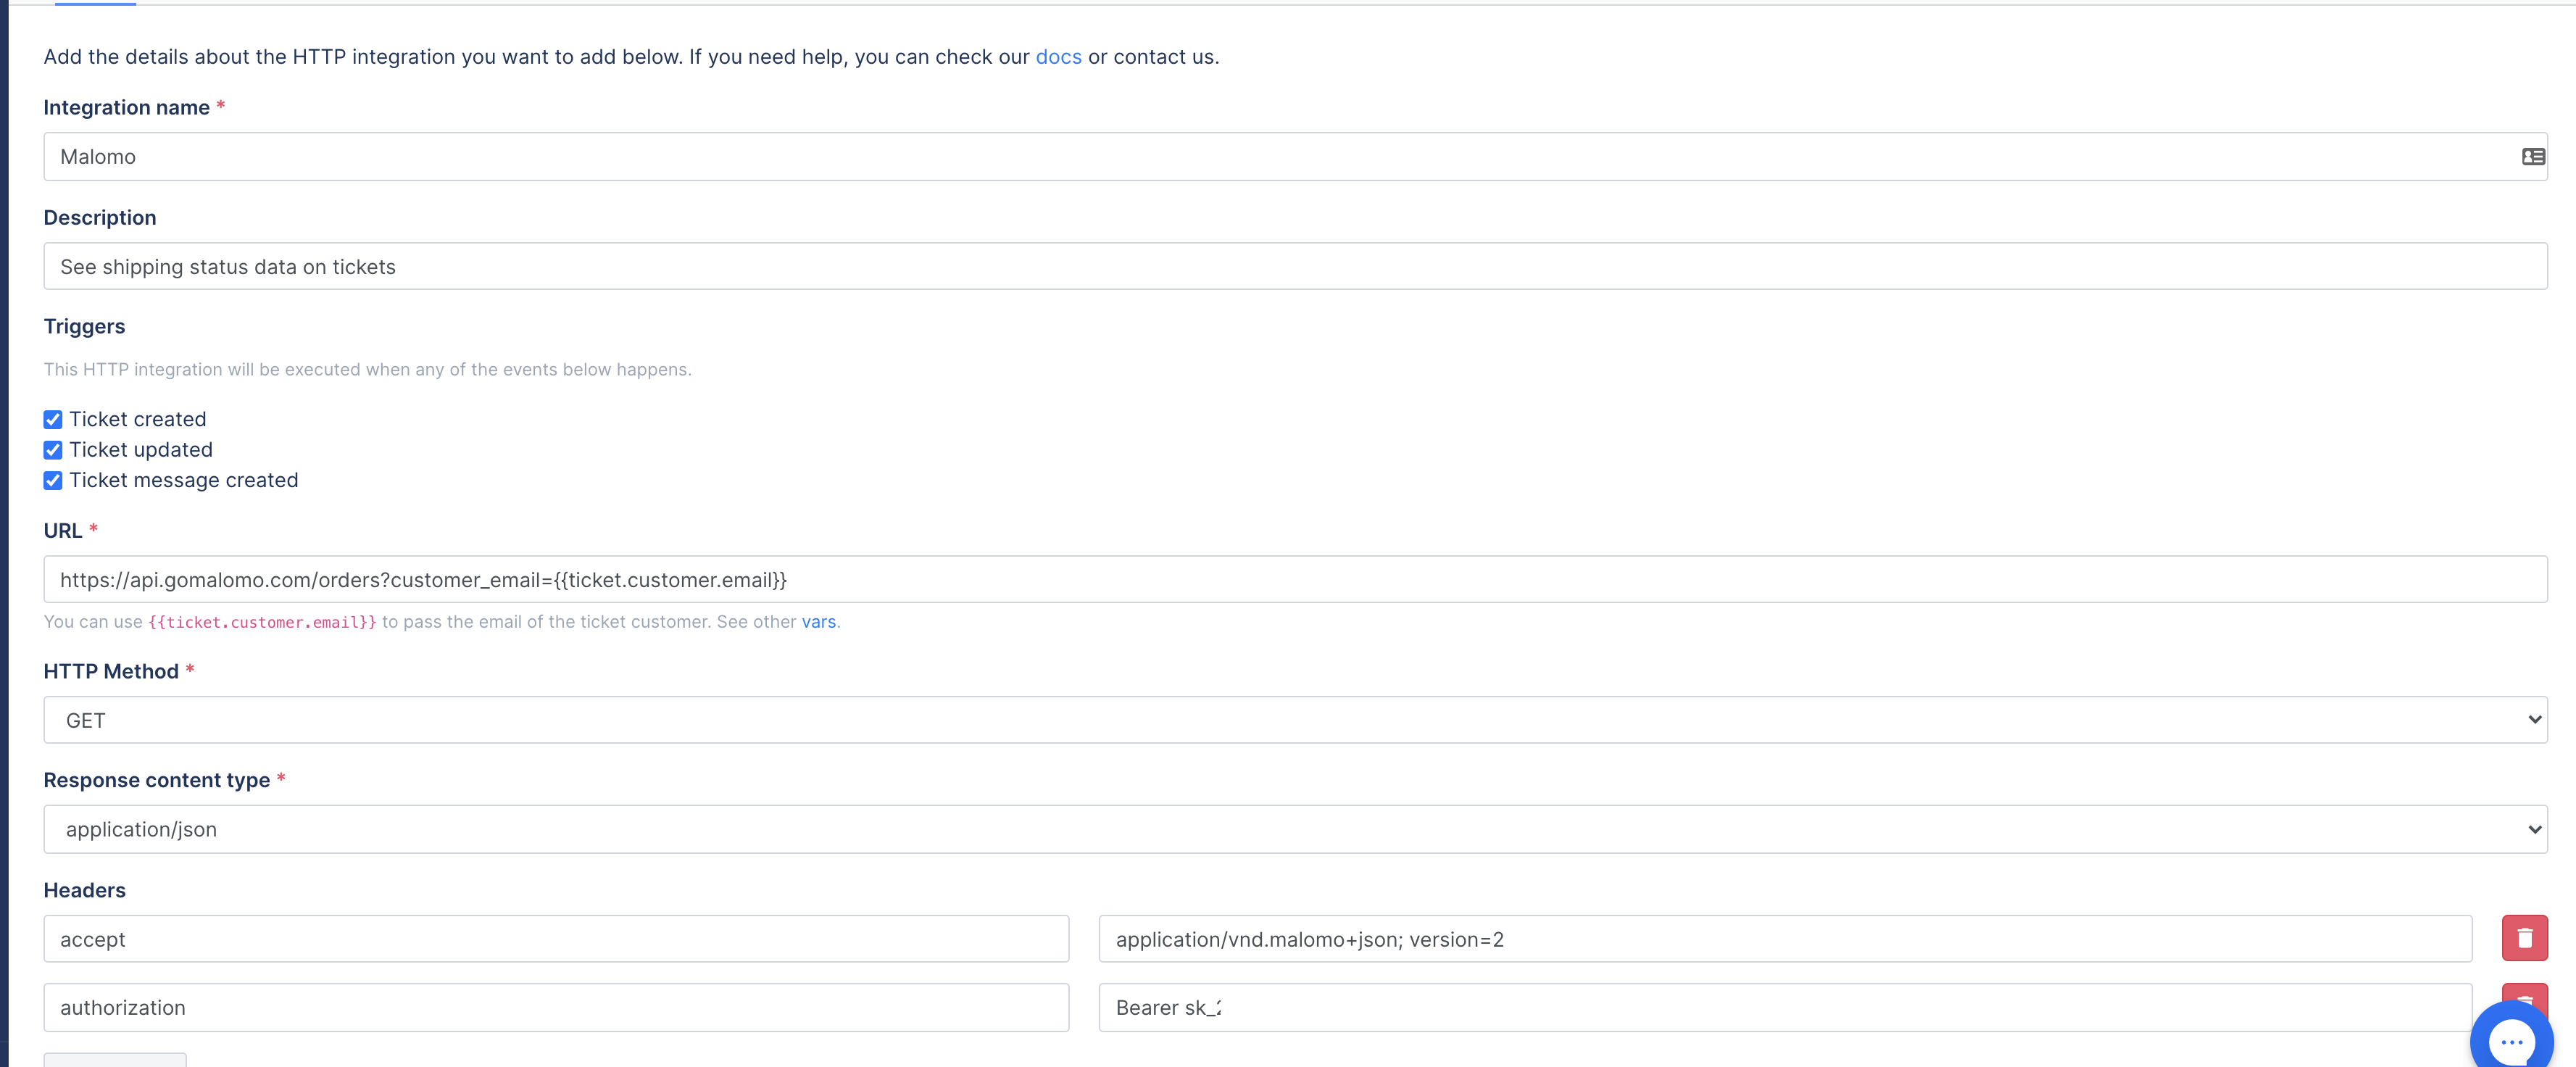
Go to ‘Settings’ -> in your Gorgias Account and select ‘HTTP’. Here, you will create an HTTP Integration that will look for the Malomo Endpoint associated with your account.
Name your Integration: Malomo
Select Triggers:
Ticket Created
Ticket Updated
Ticket Message Created.
The URL for your integration should be:
https://api.gomalomo.com/orders?customer_email={{ticket.customer.email}}HTTP Method: Get
Response content type: application/json
Headers (use the API key created in step 1 for Authorization).
Accept: application/vnd.malomo+json; version=2
Authorization: Bearer (insert API Key)
The format for the Authorization header should look something like this when input on the Gorgias end, only you will utilize the actual API key generated from the Malomo dashboard:
Bearer sk_1234Adf1234SDf1234
Congrats! Your application is now authenticated. Data will begin to populate for new tickets that come in where Malomo already has data on the customer (after an order is placed). If in further steps, your data does not populate, please review this step again, or email help@gomalomo.com.

Step 3: Configure Your Widgets.
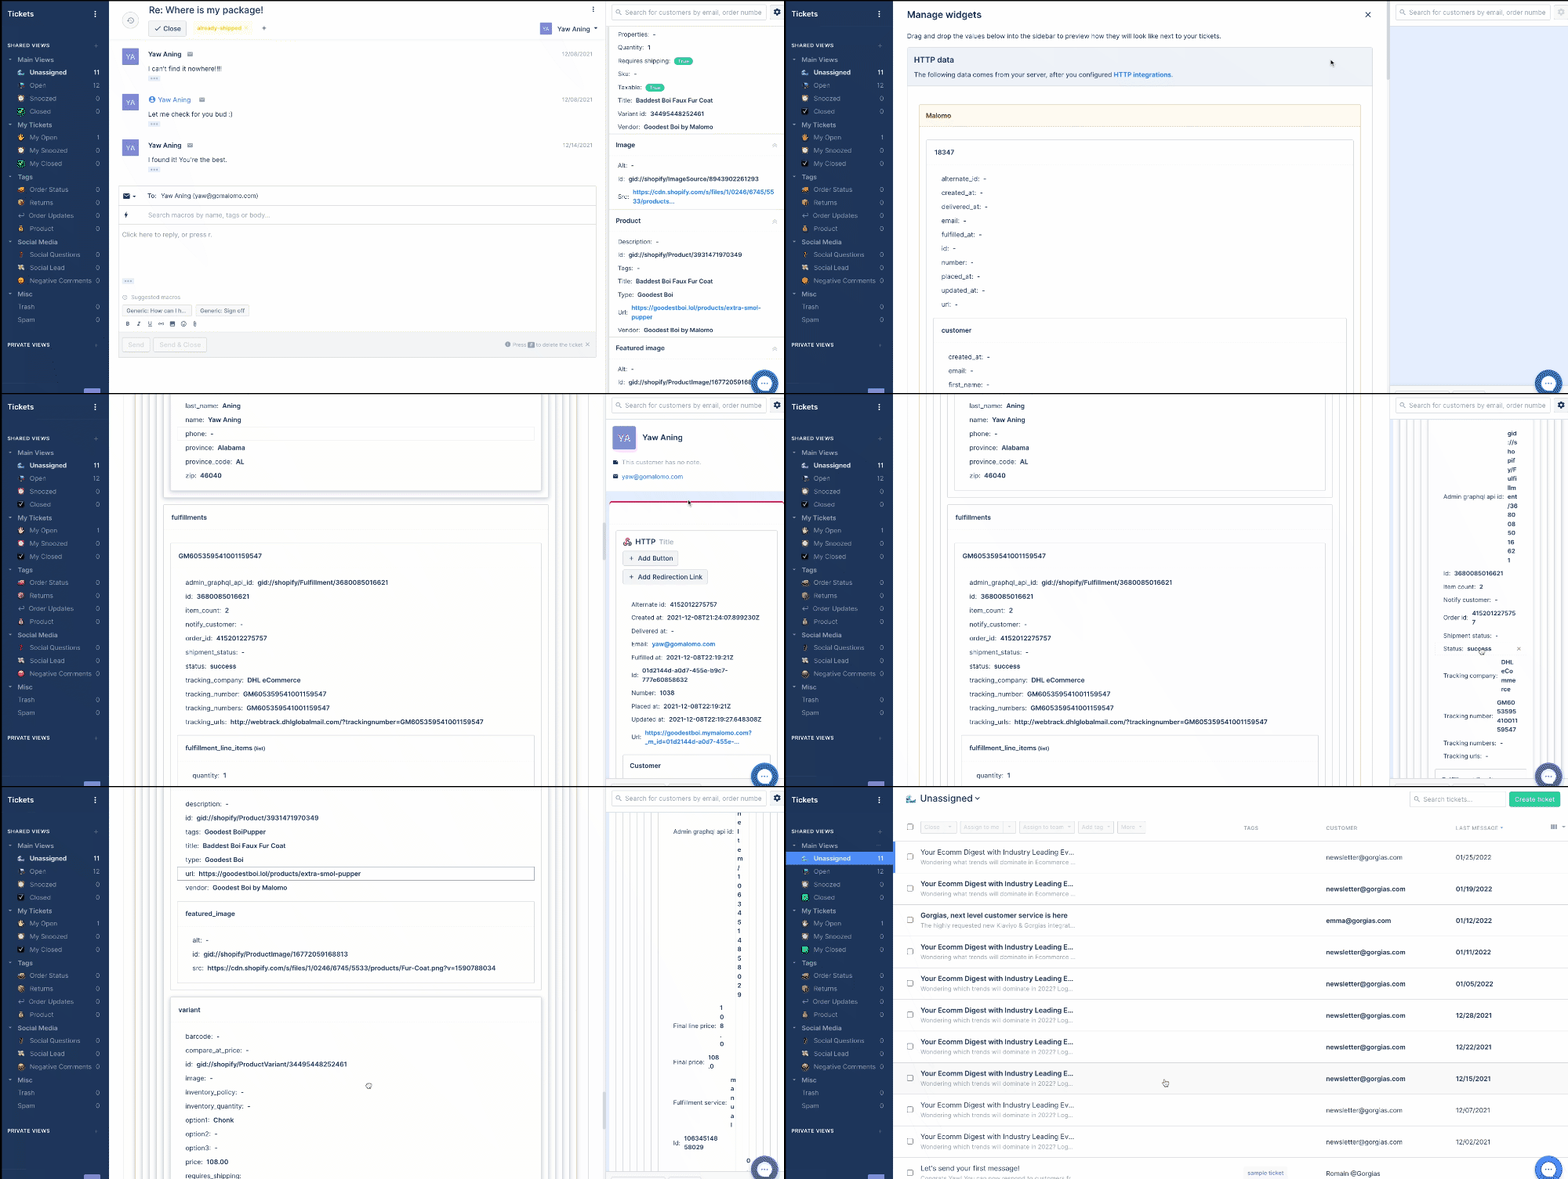
Within the Gorgias platform - you can configure what data from Malomo you want to show on your main sidebar within Gorgias. Malomo will allow you to show scan events, shipment history, and data Malomo has obtained from the Shopify Order.
In your ticket view - go to ‘Edit Widgets’. On a ticket that has a Malomo Order number, you will be able to see all shipping and Shopify information that Malomo has on the order. Review the information available and feel free to select the layout that best suits your agent’s needs!

Congratulations, once you have added the data you want on your widget - you can take advantage of quickly retrieving the data your team needs to take better care of your customers!
