
How to design Shopify emails in Klaviyo
For Shopify Standard brands that want to update the look and feel of the Shipping confirmation/order confirmation within Shopify, here is a guide for how to do so with the default Shopify templates within Klaviyo. Also, feel free to check out this handy ebook for details as well!
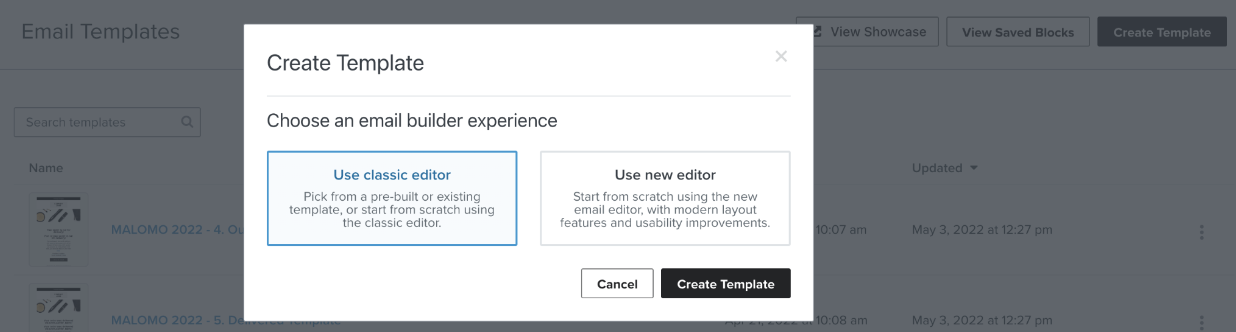
You will start in the email templates section of Klaviyo:

Click “Create Template” in the upper right hand corner (you can use the classic or new email editor for this):
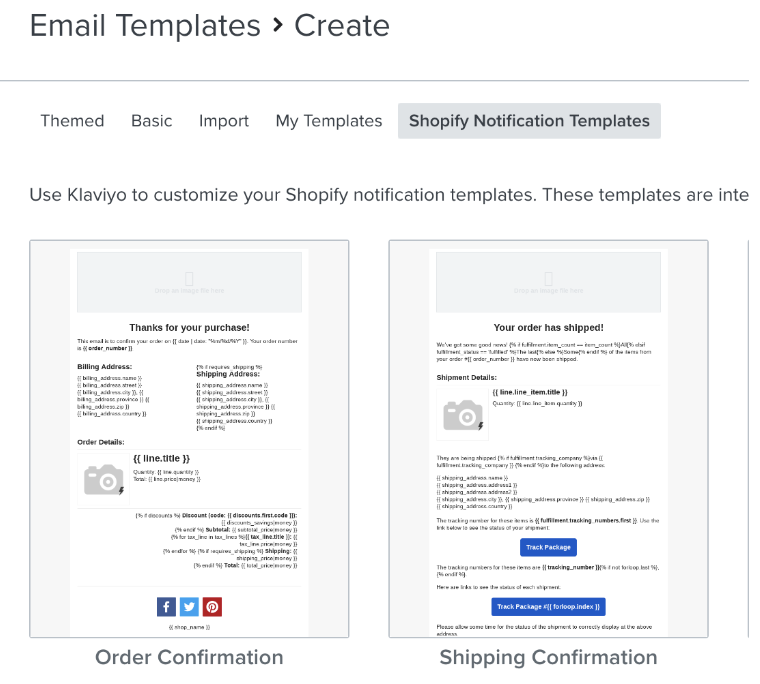
Navigate to the “Shopify Notification Templates” and select the “Shipping Confirmation” email template.
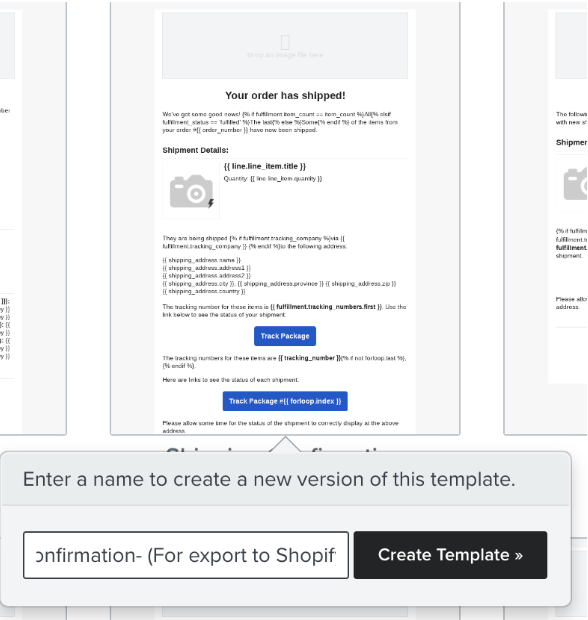
Name your email template, and select “Create Template”
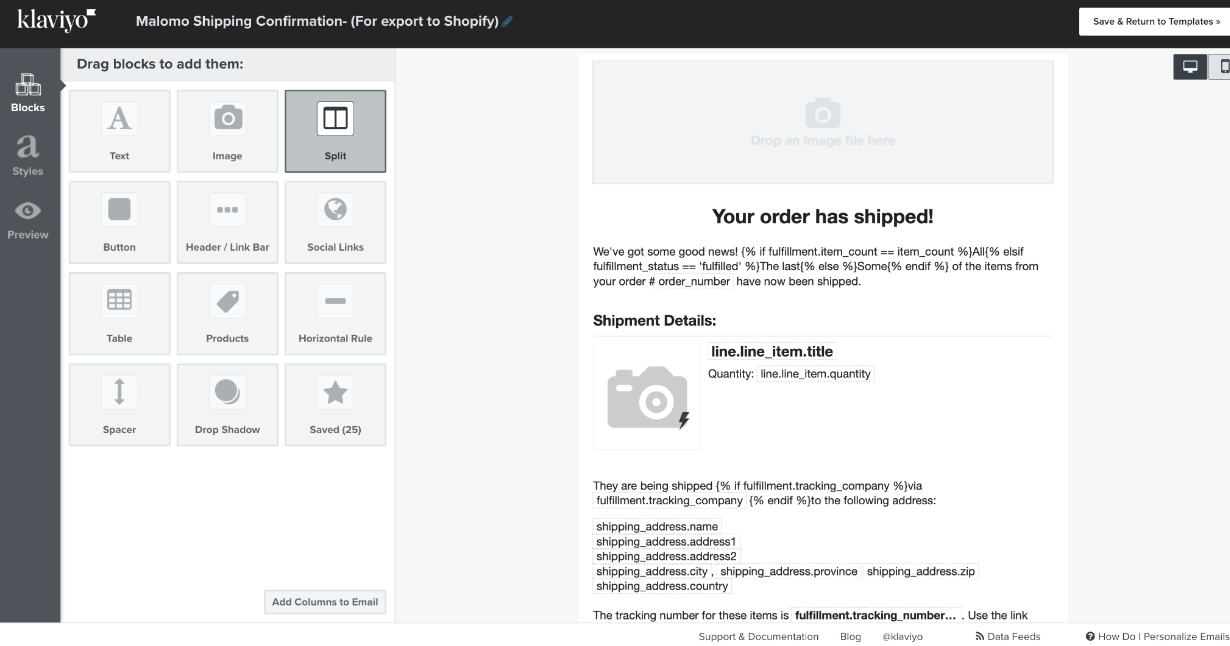
From here you will then be able to style and brand the email template with your assets:
If you'd like these emails to direct to your Malomo tracking page, follow the steps outlined in this article "Linking to Your Tracking page".
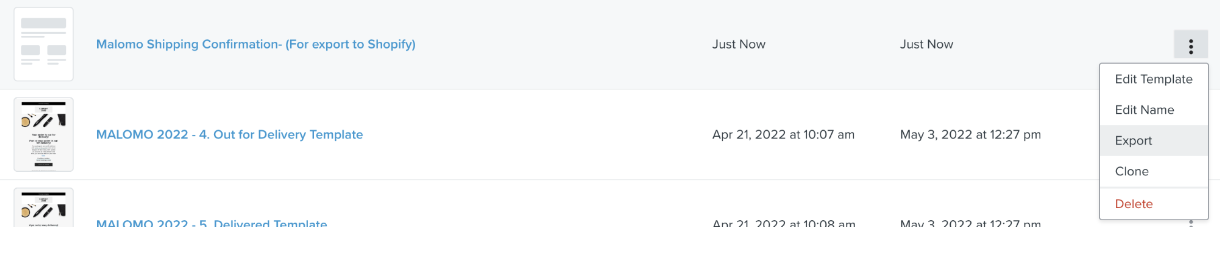
Once the design is completed, you will then click the 3 dots in the main email template list next to the Shipping Confirmation template created, and then select “Export”
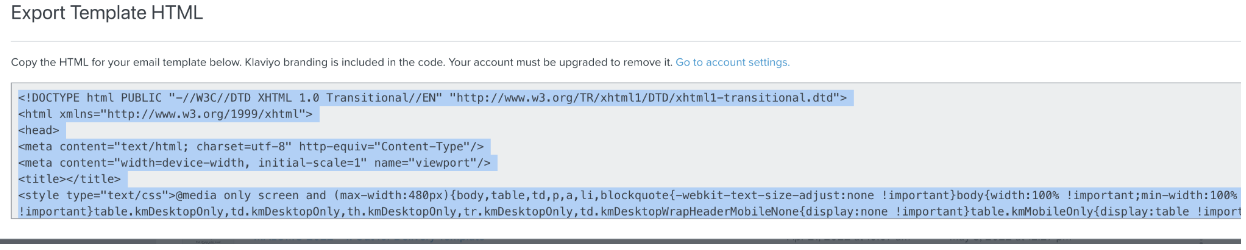
This will give you the HTML version of the code needed to input into Shopify:
From here, navigate to your notification settings in your Shopify admin and click on the email you’d like to update. Delete the code already in the HTML box. Don’t worry, you can restore it later using the “Revert to Default” button at the bottom of the page. Paste in the code you copied from Klaviyo and hit save. Click the “Preview” button to preview your email.